crwdns2931315:0crwdnd2931315:0crwdne2931315:0
crwdns2942213:0crwdne2942213:0
-
crwdns2935201:0crwdne2935201:0 crwdns2935203:0crwdne2935203:0
-
Power the laptop off.
-
Flip the laptop over and position it so the opening faces you.
-
Remove the rubber foot located near the opening side of the device using tweezers.
-
-
crwdns2935201:0crwdne2935201:0 crwdns2935203:0crwdne2935203:0
-
Unscrew the five 5-mm screws using the PH0 screwdriver.
-
-
crwdns2935201:0crwdne2935201:0 crwdns2935203:0crwdne2935203:0
-
Identify the HDMI port located in the side of the laptop opposite to the power button.
-
Insert the plastic opening tool into the divet of the back panel located above the HDMI port.
-
Pry along the laptop frame until the back panel comes loose.
-
-
crwdns2935201:0crwdne2935201:0 crwdns2935203:0crwdne2935203:0
-
Rotate the device so the opening faces you again.
-
Hold the back panel away from the laptop and remove the 4-mm screw using the PH0 screwdriver.
-
Lift the back panel gently.
-
-
crwdns2935201:0crwdne2935201:0 crwdns2935203:0crwdne2935203:0
-
Unplug the cable that connects the battery to the motherboard.
-
Detach the back panel, which still includes the battery.
-
-
-
crwdns2935201:0crwdne2935201:0 crwdns2935203:0crwdne2935203:0
-
Position the computer so the opening side faces you.
-
Remove the tape holding the WiFi module using tweezers.
-
-
crwdns2935201:0crwdne2935201:0 crwdns2935203:0crwdne2935203:0
-
Unplug the white and black wires by lifting them up by hand or using tweezers.
-
-
crwdns2935201:0crwdne2935201:0 crwdns2935203:0crwdne2935203:0
-
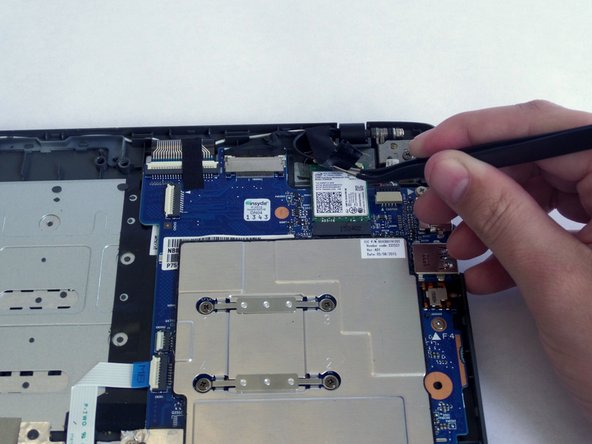
Remove the 3-mm screw that holds the WiFi module to the motherboard using the PH0 screwdriver.
-
-
crwdns2935201:0crwdne2935201:0 crwdns2935203:0crwdne2935203:0
-
Pull the WiFi module out of the connector.
-
-
crwdns2935201:0crwdne2935201:0 crwdns2935203:0crwdne2935203:0
-
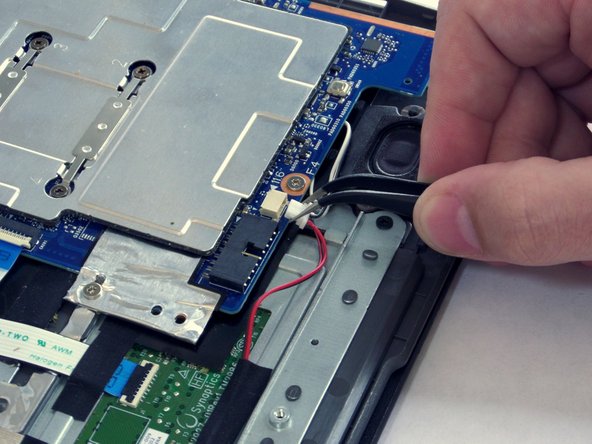
Unplug the speaker connector using tweezers.
-
-
crwdns2935201:0crwdne2935201:0 crwdns2935203:0crwdne2935203:0
-
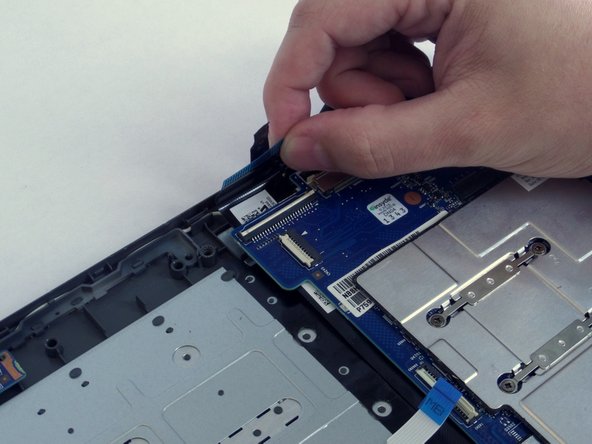
Lift the white hinge that holds the cable with a blue plastic strip.
-
Pull the blue strip away from the motherboard.
-
-
crwdns2935201:0crwdne2935201:0 crwdns2935203:0crwdne2935203:0
-
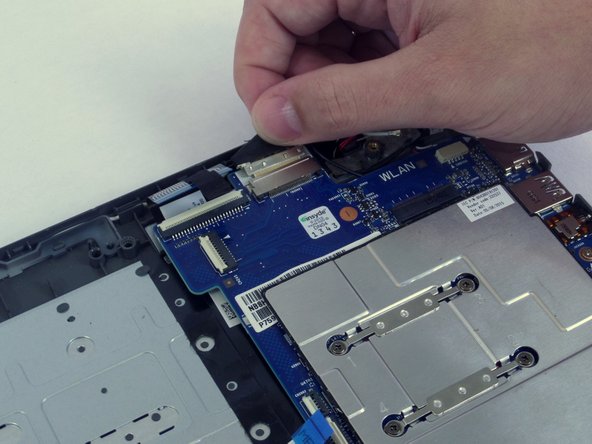
Lift the wider hinge located at the top of the motherboard holding another grey strip cable.
-
Pull the strip cable away from the motherboard.
-
-
crwdns2935201:0crwdne2935201:0 crwdns2935203:0crwdne2935203:0
-
Unplug the black covered cable from the top of the motherboard.
-
-
crwdns2935201:0crwdne2935201:0 crwdns2935203:0crwdne2935203:0
-
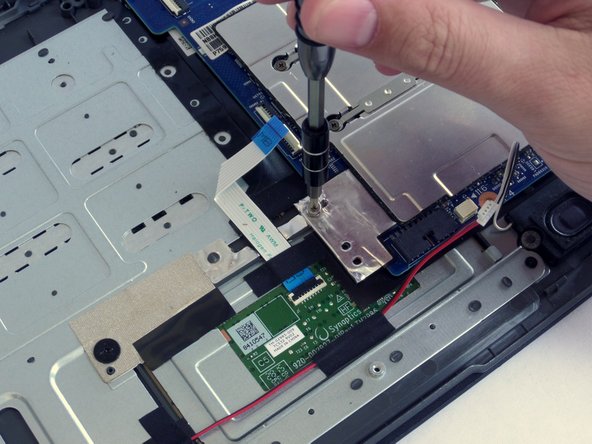
Remove the four 4-mm screws holding the metallic plate using a PH0 screwdriver.
-
-
crwdns2935201:0crwdne2935201:0 crwdns2935203:0crwdne2935203:0
-
Detach the motherboard by lifting it up and away from the body of the laptop.
-


crwdns2935221:0crwdne2935221:0
crwdns2935227:0crwdne2935227:0
crwdns2915084:0crwdne2915084:0

CSU Fullerton, Team S1-G4, Bruce Fall 2017 crwdns2935289:0CSU Fullerton, Team S1-G4, Bruce Fall 2017crwdne2935289:0
CSUF-BRUCE-F17S1G4
crwdns2931471:03crwdne2931471:0
crwdns2935297:06crwdne2935297:0
crwdns2917034:0crwdne2917034:0
Can i have link of a datasheet for this motherboard.