crwdns2915892:0crwdne2915892:0
This guide will show how to remove the HDD from your netbook. The removal of the hard drive will allow you to replace it or upgrade it to a Solid State Drive (SSD).
crwdns2942213:0crwdne2942213:0
-
-
Press the power button to turn off the netbook.
-
-
-
Place the netbook bottom-side-up on a flat surface.
-
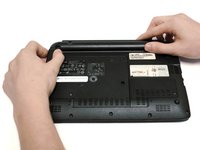
Locate the unlock latch on the top right corner of the back.
-
-
-
To unlock the battery, slide the lock latch in the direction indicated by the unlocking icon. You should see the orange indicator which means that the latch is unlocked.
-
-
-
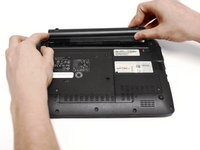
On the opposite side, slide and hold the release latch.
-
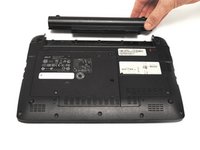
Gently slide the battery out.
-
-
-
-
Use a #0 Phillips screwdriver to remove the three 6mm screws from the larger back plate.
-
-
-
Use the plastic opening tool on the recessed notch at the bottom of the larger plate to gently lift the plate.
-
-
-
Once the plate becomes unhinged, gently rotate the plate to take it off of the device.
-
-
-
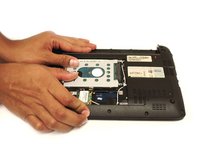
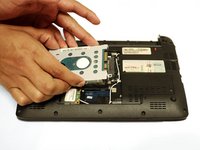
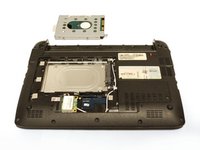
Locate the HDD after the back plate is removed. It will be the large rectangle that takes up most of the space.
-
-
-
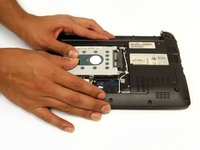
Gently press down on the HDD and slide it to the left as far as it will go.
-
-
-
Grab the edges of the HDD, slightly rotate it, and gently pull it out.
-


To reassemble your device, follow these instructions in reverse order.
crwdns2935221:0crwdne2935221:0
crwdns2935229:04crwdne2935229:0
crwdns2935287:0crwdne2935287:0

USF Tampa, Team 11-6, Blackwell Fall 2016 crwdns2935289:0USF Tampa, Team 11-6, Blackwell Fall 2016crwdne2935289:0
USFT-BLACKWELL-F16S11G6
crwdns2931471:03crwdne2931471:0
crwdns2935297:012crwdne2935297:0
crwdns2947410:01crwdne2947410:0
Wonderful guide!