crwdns2915892:0crwdne2915892:0
Is your laptop overheating or staying on for a few minutes and then powering itself down? Your CPU Fan may be to blame. This guide will show you how to replace it.
crwdns2942213:0crwdne2942213:0
-
-
Flip the laptop upside down. Rotate it so the battery faces you.
-
-
-
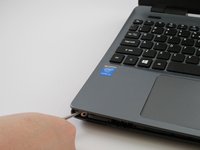
Place the pointed end of a spudger into the battery lock. Slide the battery lock to the left using the spudger. A "click" sound will accompany the release of the battery.
-
-
-
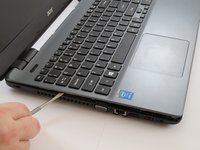
Pull the battery towards you to remove it from the laptop.
-
-
-
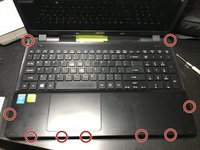
Remove all eighteen 8 mm screws with a Phillips #0 screwdriver.
-
-
-
-
Carefully pry apart the clips holding the keyboard in place by moving a metal spudger along the seam.
-
-
-
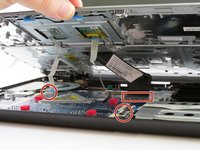
Carefully flip up the white hinge. Detach the three ZIF ribbons connected to the motherboard.
-
Remove the panel with the keyboard and the touchpad.
-
-
-
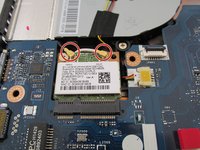
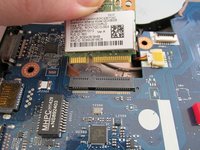
Locate the WiFi card on the motherboard.
-
-
-
Locate the two antenna cables shown.
-
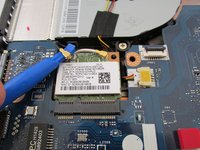
Using a plastic opening tool, remove both antenna cables from the WiFi card by gently prying them up.
-
-
-
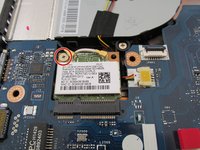
Remove this 3 mm Phillips #0 screw and the WiFi card should pop up.
-
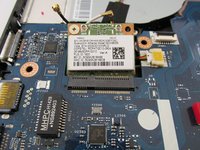
Gently lift WiFi card off of the motherboard.
-
-
-
Locate the CPU Fan in the case right above the motherboard.
-
-
-
Detach the power cable by carefully pulling on it, it will come off easily.
-
-
-
Remove both of these 6 mm Phillips #1 screws which hold the fan onto the case.
-
Now carefully lift the fan straight up and out of its place in the case.
-


To reassemble your device, follow these instructions in reverse order.
crwdns2935221:0crwdne2935221:0
crwdns2935229:04crwdne2935229:0

crwdns2935287:0crwdne2935287:0

USF Tampa, Team 4-2, Meier Fall 2015 crwdns2935289:0USF Tampa, Team 4-2, Meier Fall 2015crwdne2935289:0
USFT-MEIER-F15S4G2
crwdns2931471:03crwdne2931471:0
crwdns2935297:05crwdne2935297:0