crwdns2915892:0crwdne2915892:0
Should you wish to replace or upgrade the memory in your laptop, this guide will show you how to access and remove your old RAM.
crwdns2942213:0crwdne2942213:0
-
-
Remove the 13 indicated screws (6.2 mm) using a Phillips #1 screwdriver.
-
-
-
Insert your plastic opening tool between the bottom case and the rest of the laptop.
-
Using the plastic opening tool as a lever, apply downward pressure on the tool to lift the bottom up.
-
Make your way around the case with the tool, every so often applying downward pressure to lift the bottom up.
-
Lift the bottom off the laptop.
-
-
crwdns2935267:0crwdne2935267:0Anti-Static Wrist Strap$7.95
-
Press and hold the battery discharge button on the motherboard for 5 seconds to drain the battery.
-
-
-
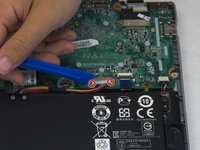
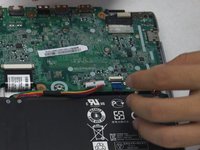
Dislodge the battery's connector to the motherboard by using the plastic opening tool as a lever on the two small plastic tabs that stick out on either side of the connector.
-
-
-
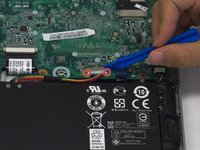
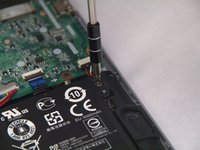
Unscrew the two 6.2 mm Phillips #1 head screws on either side of the battery as indicated.
-
-
-
-
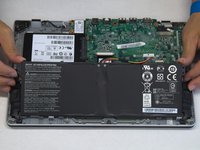
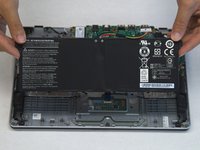
Lift the battery up and off the rest of the laptop.
-
-
-
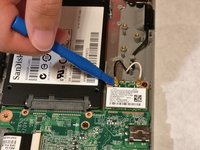
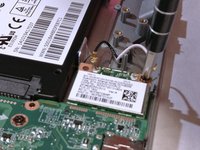
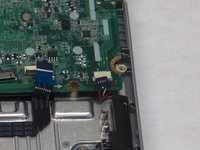
Remove the two antenna cables from the wireless card. These should snap lightly out of place when lifted upwards.
I was able to skip this Step 7 because the antenna leads were long enough for the card to slide out after removing the retaining screw as shown in Step 8.
-
-
-
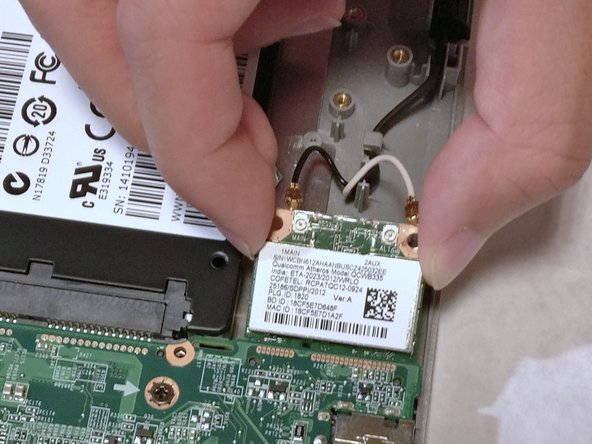
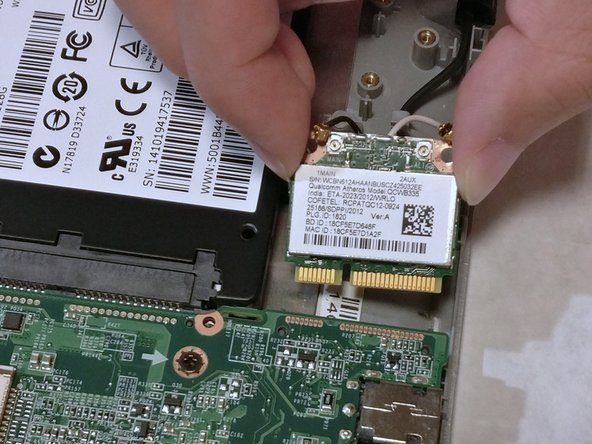
Remove the 6.2mm #1 Phillips head screw attaching the wireless card to the case.
-
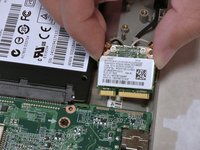
Pull the wireless card horizontally away from the motherboard to remove it from the connector.
-
-
-
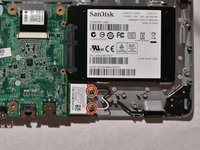
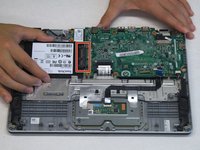
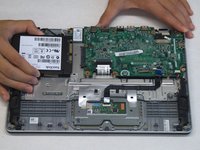
Holding the laptop in place, slide the hard drive horizontally out from the SATA connector.
-
-
-
Lightly pry upwards on the black plastic tab to release the touchpad cable, then gently pull the cable from the connector.
-
-
-
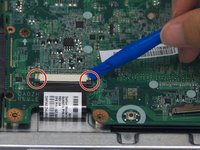
Find the keyboard cable. Pull the two gray plastic tabs outwards to release the ribbon. Gently pull the cable from the connector.
Great that you had the second extra close up shot showing where exactly the two gray plastic tabs were. It was not obvious to me when I first looked at the connector on my on Acer.
-
-
-
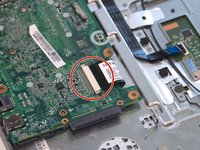
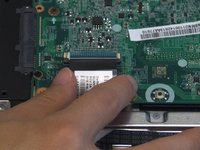
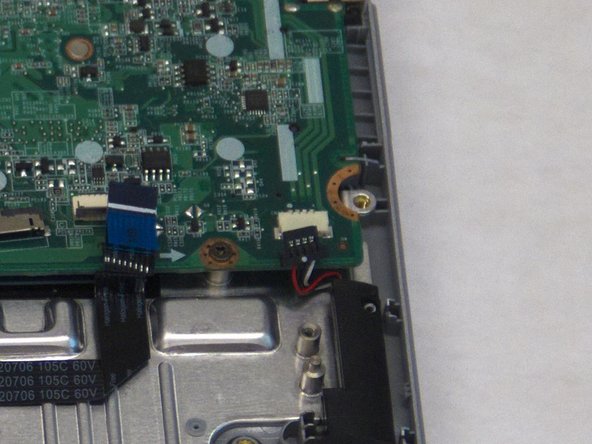
Pull down gently on the black speaker cable connector to disconnect it from the motherboard.
-
-
-
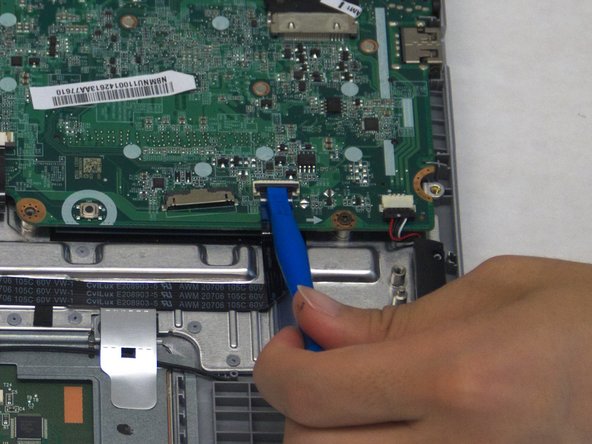
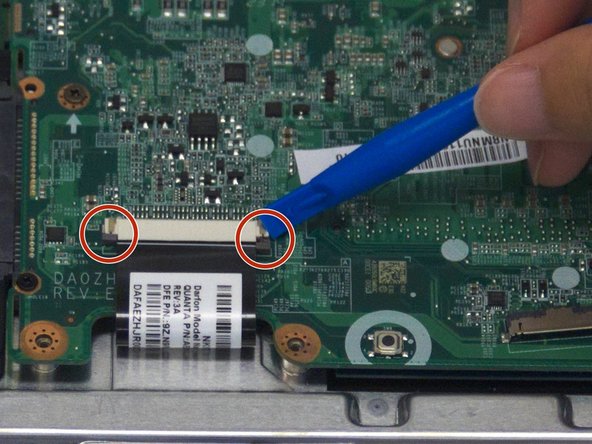
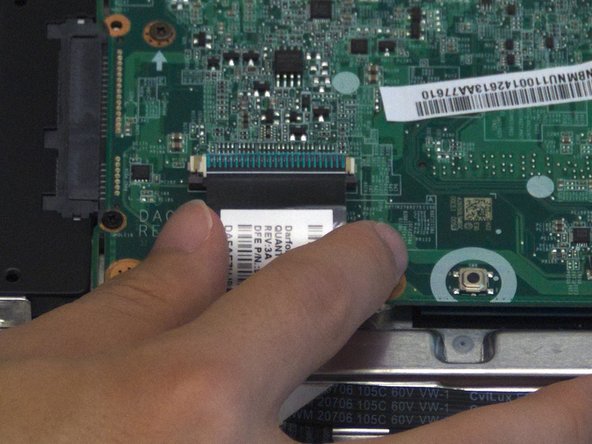
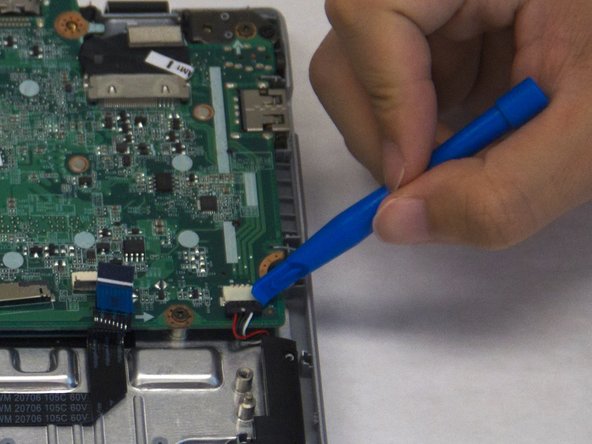
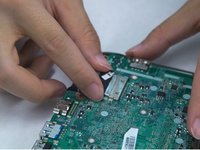
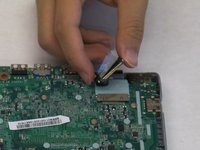
Peel up the tape adhering the display cable to the connector on the motherboard.
-
Slide the display cable horizontally out of the connector to remove it from the motherboard.
Again, thank you for those clear shots of the clear cellophane like tape. Initially, I thought I had to remove the black tape that was on the connector. That clear tape was nearly invisible on my computer and I probably would have messed up that connector pulling at the wrong thing.
-
-
-
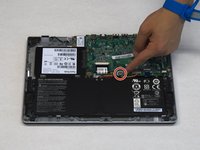
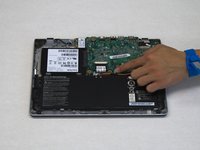
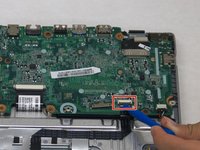
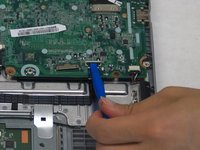
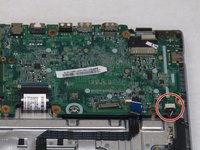
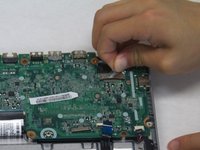
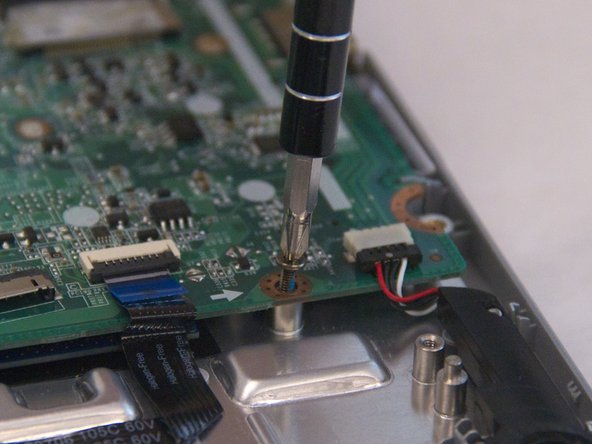
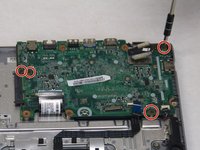
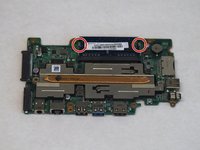
Unscrew the four 6.2mm Phillips #1 screws attaching the motherboard to the case.
-
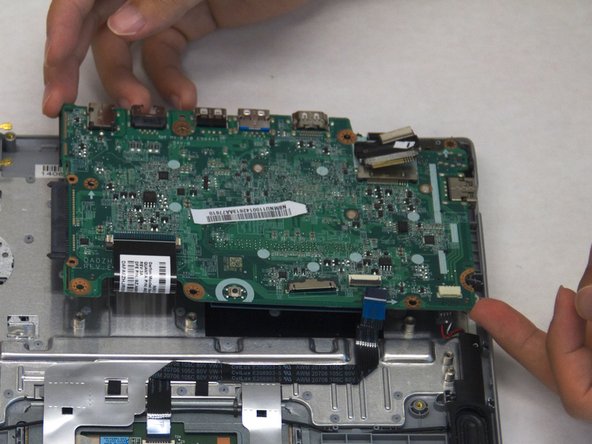
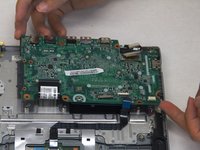
With all the screws and cables detached, lift the motherboard directly upwards out of the case.
Actually, there are only three screws attaching the motherboard to the case. The farthest screw to left in your photo with the red circles actually belongs to the hard drive connector. Each of the three screws holding the motherboard down actually have a white arrow pointing toward them on the motherboard. Please see your second photo with the closeup of the screw driver and you’ll see the white arrow located just left of the screw.
-
-
-
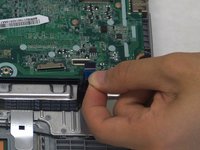
Flip over the motherboard after removing it from the case.
-
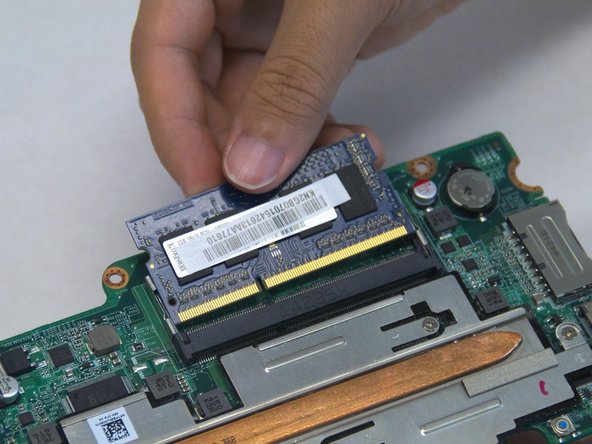
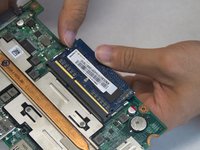
Apply pressure outward on the metal tabs on either side of the RAM stick to release them from the notches on the stick.
-
After the tabs have been released, slide the RAM out of the slot.
-


To reassemble your device, follow these instructions in reverse order.
To reassemble your device, follow these instructions in reverse order.
crwdns2935221:0crwdne2935221:0
crwdns2935229:02crwdne2935229:0
crwdns2915084:0crwdne2915084:0

UC Santa Barbara, Team S1-G2, Weedon Fall 2017 crwdns2935289:0UC Santa Barbara, Team S1-G2, Weedon Fall 2017crwdne2935289:0
UCSB-WEEDON-F17S1G2
crwdns2931471:05crwdne2931471:0
crwdns2935297:05crwdne2935297:0
crwdns2947410:01crwdne2947410:0
Thank you for this very well done step by step guide! I updated the RAM in this computer with no issues because of your procedure. FYI - I am a fellow Gaucho graduate way back from the Class of 1981.