crwdns2915892:0crwdne2915892:0
Hello everyone, in this guide Ill be showing you how to open the laptop in order to change the thermal paste and possibly upgrade the RAM, SSD and CPU inside.
crwdns2942213:0crwdne2942213:0
-
-
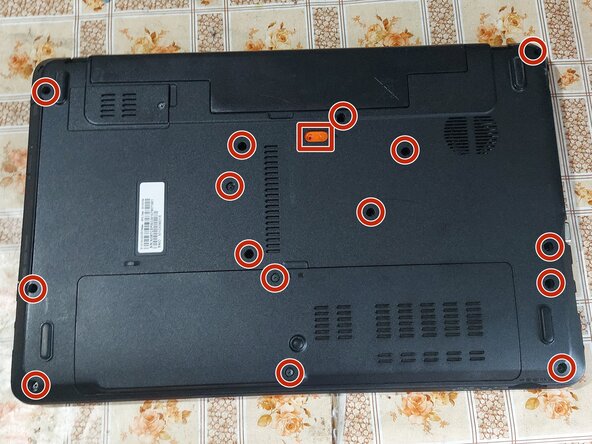
Remove all the shown screws, slide out the battery and DVD drive. The screws marked in RED are M3.0x8.0.
-
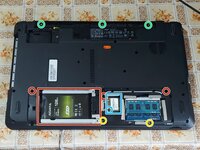
Remove the Wi-Fi mini PCI card (marked in blue) and the SSD.
-
Remove the screws marked in GREEN (M2.0x3.0) and YELLOW (M2.5x5.0).
-
Here you can upgrade the RAM and SSD before finishing.
-
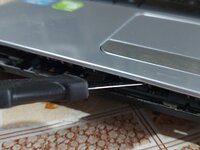
Use a prying tool to release all the clips and remove the palmrest.
-
In my guide I will NOT be removing the keyboard, because I was able to connect and disconnect the connectors regardless. For you, it may be recommended. There are 3 connectors that need to be unplugged (power switch, mousepad, keyboard).
-
-
-
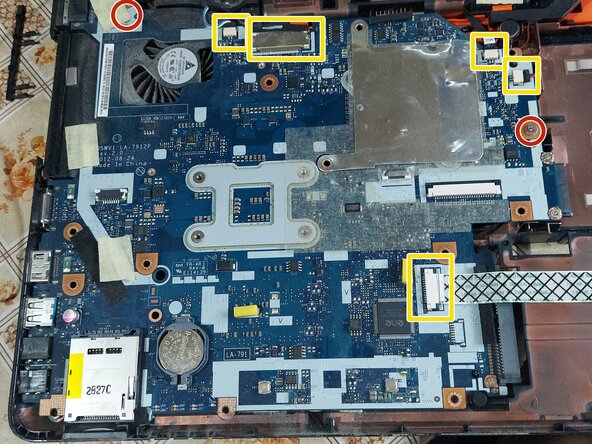
Remove the 2 screws that hold the motherboard in place.
-
Disconnect all the marked connectors.
-
Carefully lift the motherboard from the DVD connector, flip it, disconnect the power connector and slide the motherboard out.
-
-
-
-
Unscrew the heatsink (RED).
-
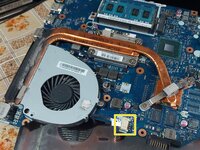
Unscrew the fan (GREEN) and disconnect it.
-
Clean the old thermal paste both from the cooler and the CPU+GPU. It is best to use isopropyl alcohol and cotton swabs or paper towel, but be careful not to go too hard on the CPU+GPU.
-
When the fan is removed, it can be opened by unscrewing the 4 screws that hold it together, for further cleaning. When putting it back together, be vary careful while tightening those, because the plastic is very fragile.
-
It is also recommended to use compressed air to remove any dust in the laptop case itself.
-
Here you can upgrade the CPU if you want.
-
-
-
Don`t use too much thermal paste, just enough to cover some portion of the pad. If you have a spreader, use it. The thermal paste will apply evenly after you tighten the heatsink.
-
Last, put the heatsink back carefully and tighten the screws in order to ensure even pressure.
-
Don`t forget to plug in the fan connector!
-
To reassemble your device, follow these instructions in reverse order.
To reassemble your device, follow these instructions in reverse order.
crwdns2935221:0crwdne2935221:0
crwdns2935227:0crwdne2935227:0
