crwdns2933423:0crwdne2933423:0

Acer Aspire E1-531-2438 Speakers Replacement

crwdns2942213:0crwdne2942213:0

  1. Acer Aspire E1-531-2438 Speakers Replacement, Battery: crwdns2935265:01crwdnd2935265:01crwdnd2935265:02crwdne2935265:0 Acer Aspire E1-531-2438 Speakers Replacement, Battery: crwdns2935265:01crwdnd2935265:02crwdnd2935265:02crwdne2935265:0
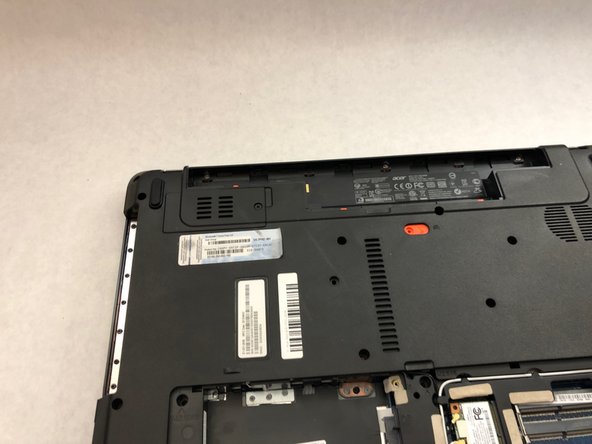
    • Unplug and power down the device before removing the battery.

    • Turn the device over so the back side is facing up.

    • Using a spudger, slide the orange latch to the right. This will release the battery, which should pop up from the device.

    • Use two hands tilt the side of the battery closest to the orange latch upward as shown in the images.

  2. Acer Aspire E1-531-2438 Speakers Replacement: crwdns2935265:02crwdnd2935265:01crwdnd2935265:01crwdne2935265:0
    • Tilt the side of the battery closest to the orange latch upward.

    • Lift the battery up and out of the device.

  3. Acer Aspire E1-531-2438 Speakers Replacement, Hard Drive: crwdns2935265:03crwdnd2935265:01crwdnd2935265:02crwdne2935265:0 Acer Aspire E1-531-2438 Speakers Replacement, Hard Drive: crwdns2935265:03crwdnd2935265:02crwdnd2935265:02crwdne2935265:0
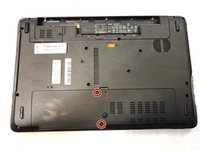
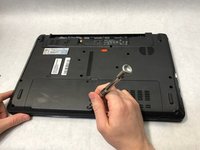
    • Using a Phillips #0 screwdriver, remove the two 9mm screws on the access panel.

  4. Acer Aspire E1-531-2438 Speakers Replacement: crwdns2935265:04crwdnd2935265:01crwdnd2935265:03crwdne2935265:0 Acer Aspire E1-531-2438 Speakers Replacement: crwdns2935265:04crwdnd2935265:02crwdnd2935265:03crwdne2935265:0 Acer Aspire E1-531-2438 Speakers Replacement: crwdns2935265:04crwdnd2935265:03crwdnd2935265:03crwdne2935265:0
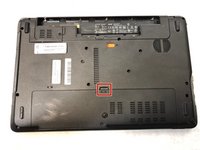
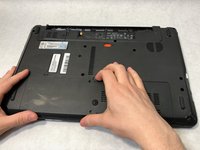
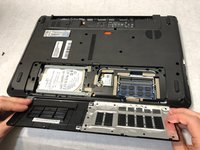
    • Using the indentation, pry open the access panel with your fingers or a spudger.

    • Remove the access panel to expose the hard drive, WiFi chip, and RAM modules.

  5. Acer Aspire E1-531-2438 Speakers Replacement: crwdns2935265:05crwdnd2935265:01crwdnd2935265:03crwdne2935265:0 Acer Aspire E1-531-2438 Speakers Replacement: crwdns2935265:05crwdnd2935265:02crwdnd2935265:03crwdne2935265:0 Acer Aspire E1-531-2438 Speakers Replacement: crwdns2935265:05crwdnd2935265:03crwdnd2935265:03crwdne2935265:0
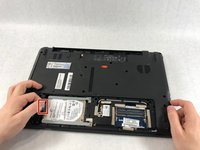
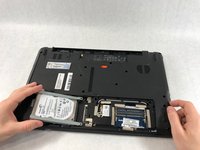
    • Grip the plastic tab on the hard drive, then pull to the left to unplug the drive from its socket.

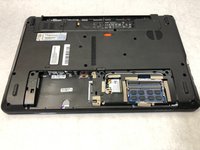
    • Once free from the socket, lift the hard drive up and out of the device.

  6. Acer Aspire E1-531-2438 Speakers Replacement, Speakers: crwdns2935265:06crwdnd2935265:01crwdnd2935265:03crwdne2935265:0 Acer Aspire E1-531-2438 Speakers Replacement, Speakers: crwdns2935265:06crwdnd2935265:02crwdnd2935265:03crwdne2935265:0 Acer Aspire E1-531-2438 Speakers Replacement, Speakers: crwdns2935265:06crwdnd2935265:03crwdnd2935265:03crwdne2935265:0
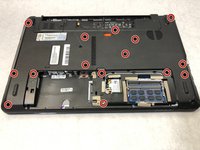
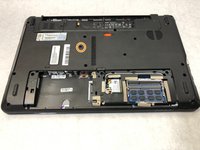
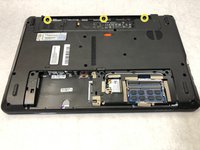
    • Using a Phillips #0 screwdriver, remove all of the following screws:

    • Fifteen 9mm size screws

    • One 6mm screw

    • Three 3.5mm screws

  7. Acer Aspire E1-531-2438 Speakers Replacement: crwdns2935265:07crwdnd2935265:01crwdnd2935265:03crwdne2935265:0 Acer Aspire E1-531-2438 Speakers Replacement: crwdns2935265:07crwdnd2935265:02crwdnd2935265:03crwdne2935265:0 Acer Aspire E1-531-2438 Speakers Replacement: crwdns2935265:07crwdnd2935265:03crwdnd2935265:03crwdne2935265:0
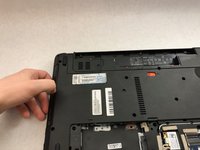
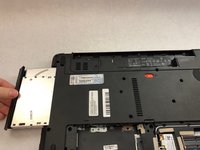
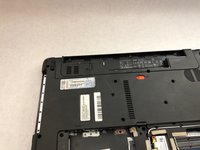
    • Remove the optical drive by sliding it out of its slot on the side of the laptop.

  8. Acer Aspire E1-531-2438 Speakers Replacement: crwdns2935265:08crwdnd2935265:01crwdnd2935265:02crwdne2935265:0 Acer Aspire E1-531-2438 Speakers Replacement: crwdns2935265:08crwdnd2935265:02crwdnd2935265:02crwdne2935265:0
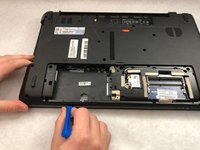
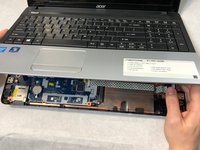
    • Using a plastic opening tool, pry along the seam running the perimeter of the laptop to separate the bottom case from the palmrest assembly.

    • Flip the device over and open the laptop so that the keyboard is visible.

    • Lift up the palmrest assembly just far enough to access the connectors underneath.

  9. Acer Aspire E1-531-2438 Speakers Replacement: crwdns2935265:09crwdnd2935265:01crwdnd2935265:02crwdne2935265:0 Acer Aspire E1-531-2438 Speakers Replacement: crwdns2935265:09crwdnd2935265:02crwdnd2935265:02crwdne2935265:0
    crwdns2935267:0crwdne2935267:0
    Tweezers
    $4.99
    crwdns2942207:0crwdne2942207:0
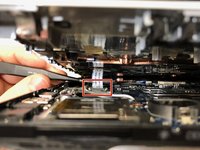
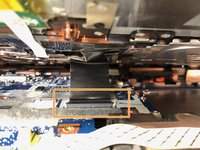
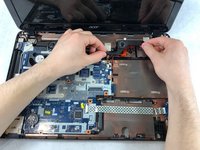
    • Using a pair of tweezers, disconnect the small white ribbon cable from the connector near the left side of the device.

    • Disconnect the large black ribbon cable near the middle of the device. Gently pull on the cable away from you.

  10. Acer Aspire E1-531-2438 Speakers Replacement: crwdns2935265:010crwdnd2935265:01crwdnd2935265:01crwdne2935265:0
    • Lift and remove the palmrest assembly and the attached keyboard.

  11. Acer Aspire E1-531-2438 Speakers Replacement: crwdns2935265:011crwdnd2935265:01crwdnd2935265:03crwdne2935265:0 Acer Aspire E1-531-2438 Speakers Replacement: crwdns2935265:011crwdnd2935265:02crwdnd2935265:03crwdne2935265:0 Acer Aspire E1-531-2438 Speakers Replacement: crwdns2935265:011crwdnd2935265:03crwdnd2935265:03crwdne2935265:0
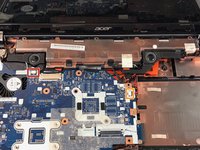
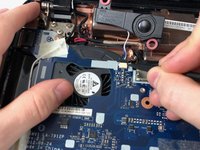
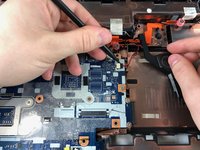
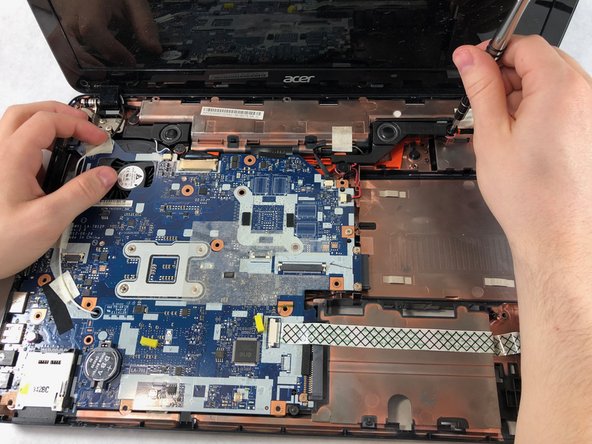
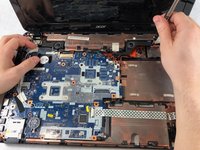
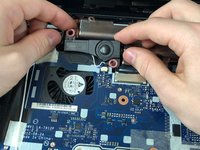
    • Using a spudger, disconnect the connector for the left speaker.

    • Disconnect the right speaker connector in the same manner.

  12. Acer Aspire E1-531-2438 Speakers Replacement: crwdns2935265:012crwdnd2935265:01crwdnd2935265:02crwdne2935265:0 Acer Aspire E1-531-2438 Speakers Replacement: crwdns2935265:012crwdnd2935265:02crwdnd2935265:02crwdne2935265:0
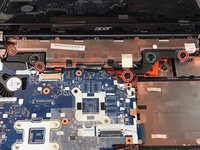
    • Using a Phillips #0 screwdriver, remove the four 3mm screws to release the left and right speakers.

  13. Acer Aspire E1-531-2438 Speakers Replacement: crwdns2935265:013crwdnd2935265:01crwdnd2935265:02crwdne2935265:0 Acer Aspire E1-531-2438 Speakers Replacement: crwdns2935265:013crwdnd2935265:02crwdnd2935265:02crwdne2935265:0
    • Lift and remove the left and right speakers.

crwdns2915888:0crwdne2915888:0

To reassemble your device, follow these instructions in reverse order.

Jakob Rinkus

crwdns2935283:003/21/19crwdne2935283:0

965 crwdns2915208:0crwdne2915208:0

crwdns2935297:07crwdne2935297:0

crwdns2915084:0crwdne2915084:0

UMass Dartmouth, Team S8-G2, Bailey Spring 2019 crwdns2935289:0UMass Dartmouth, Team S8-G2, Bailey Spring 2019crwdne2935289:0

UMASSD-BAILEY-S19S8G2

crwdns2931471:03crwdne2931471:0

crwdns2935297:07crwdne2935297:0

crwdns2944067:00crwdne2944067:0

crwdns2917038:0crwdne2917038:0

crwdns2936625:0crwdne2936625:0:

crwdns2936751:024crwdne2936751:0 2

crwdns2936753:07crwdne2936753:0 14

crwdns2936753:030crwdne2936753:0 24

crwdns2942667:0crwdne2942667:0 1,112