crwdns2942213:0crwdne2942213:0
-
-
To release the battery, depress the battery release with a nylon spudger. Hold the latch down and slide it over.
-
-
-
Firmly grab hold of the battery and slide it out of the laptop.
-
-
-
Remove the M2.5x8 screw with a PH1 screwdriver.
-
-
-
Use the plastic opening tool to pop off the small back cover.
-
-
-
-
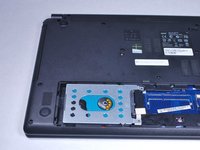
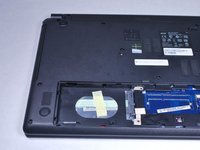
Use a PH0 Phillips screwdriver to remove the screw securing the hard drive.
-
-
-
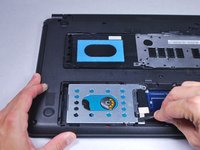
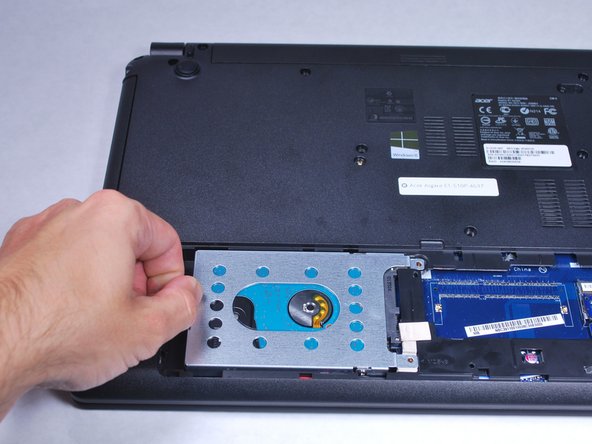
Use a nylon spudger to slightly pry up the hard drive near the screw holes.
-
-
-
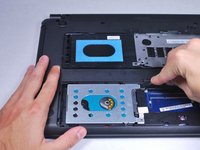
Grab hold of the plastic tab and pull the hard drive away from the connectors. This will release the hard drive.
-
-
-
Remove the fourteen M2.5x8 screws highlighted in the picture with a PH0 Phillips screwdriver.
-
-
-
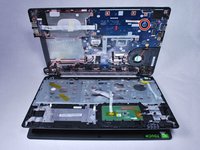
Use the plastic opening tool to gently pry open the laptop.
-
-
-
Slowly rotate the back cover up to reveal cables attached to the motherboard.
-
Carefully slide the connectors out of their receptacle to remove the back panel.
-
-
-
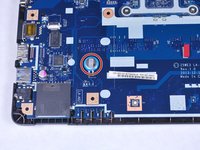
Open the up the laptop to reveal the CMOS battery.
-
Desolder the CMOS battery to remove it. For soldering help, check out iFixit's soldering guide.
-


To reassemble your device, follow these instructions in reverse order.
crwdns2935221:0crwdne2935221:0
crwdns2935229:06crwdne2935229:0
crwdns2935287:0crwdne2935287:0

Cal Poly, Team 34-15, Maness Spring 2016 crwdns2935289:0Cal Poly, Team 34-15, Maness Spring 2016crwdne2935289:0
CPSU-MANESS-S16S34G15
crwdns2931471:04crwdne2931471:0
crwdns2935297:06crwdne2935297:0
crwdns2947412:02crwdne2947412:0
molto utile e ben fatta, anche se il mio problema è più legato alla alimentazione che pare non funzionare anche senza batteria
It'd be really handy if you were to list the model number of the CMOS battery so we can order one in advance.