crwdns2915892:0crwdne2915892:0
This guide will show you how to replace the motherboard in an Acer Aspire 5100 laptop. This is needed when your laptop begins to shut down or freeze. A motherboard can also be referred to as a mainboard. A motherboard is an essential part of a computer system. This can be used if you need to change the hardware or clean it. This task can serve to help you complete any repairs or upgrades you want to make. Be aware this replacement requires a lot of delicate work.
crwdns2942213:0crwdne2942213:0
-
-
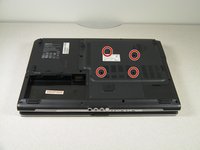
Flip the laptop upside-down.
-
Remove the four screws attached to the large panel.
-
-
-
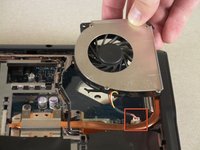
Remove the two screws attached to the fan.
-
-
-
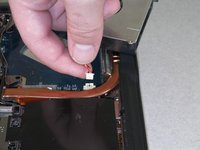
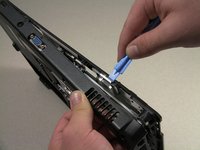
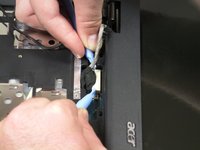
Lift the fan and detach the cable that connects the fan to the motherboard.
-
When detaching the cable, do not pull on the cable itself. Instead, use a small spudger to detach it at the white section that connects it to the motherboard.
-
-
-
Open and push the screen back all the way until it is horizontal with the rest of the laptop.
-
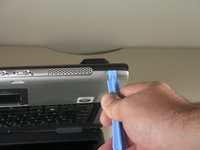
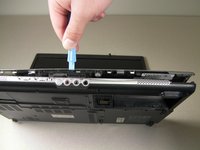
Use an opening tool to remove the panel above the keyboard that has the power button on it.
-
After you have released the tabs, lift up the panel.
-
-
-
Under the panel, remove the two screws that connect the keyboard to the laptop.
-
-
-
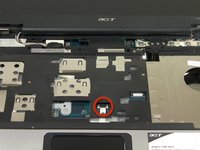
Release the catch on the ribbon socket by sliding the two tabs toward the ribbon.
-
Pull the ribbon under the keyboard to detach it from the motherboard.
-
Remove the keyboard.
-
-
-
-
Remove the nine screws from the back edges of the laptop.
-
-
-
Open the lid of the laptop and locate the cover that surrounds the keyboard and track pad.
-
Use the spudger to pry open the sides of this cover.
-
-
-
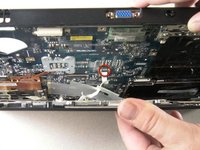
Slightly lift up the cover to see the ribbon connection.
-
Release the catch by sliding the two lugs toward the ribbon, then pull the ribbon to detach it from the motherboard.
-
Lift up the cover from the laptop.
-
-
-
On the cover that was removed, flip it around and locate where the back of the track pad is.
-
Remove the three screws located at the corners.
-
Lift up the bracket that you just unscrewed and remove track pad.
-
-
-
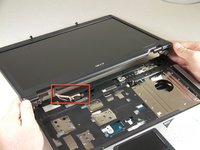
Remove the two screws from each corner beneath the LCD screen.
-
-
-
Detach the white rectangle located on the motherboard at the end of the wire connected to the LCD screen.
-
-
-
Flip the laptop upside down.
-
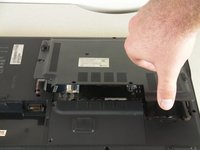
Remove the four screws from the back panel of the laptop.
-
Lift the panel up and set it aside.
-
-
-
Remove the 15 screws from the motherboard.
-
-
-
Flip the laptop upside down.
-
Locate the heat sink, which is the copper "L" shaped component, and unscrew the four screws that connect it to the motherboard.
-
-
-
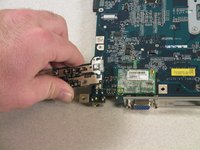
Push out the back of the casing by the VGA connector to remove the motherboard.
-
-
-
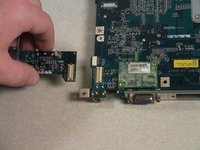
Lift up and remove the motherboard from the laptop casing.
-
Remove the USB add-on card to use it with the new motherboard.
-


To reassemble your device, follow these instructions in reverse order.
To reassemble your device, follow these instructions in reverse order.
crwdns2935221:0crwdne2935221:0
crwdns2935229:08crwdne2935229:0
crwdns2915084:0crwdne2915084:0

Cal Poly, Team 14-39, Forte Fall 2010 crwdns2935289:0Cal Poly, Team 14-39, Forte Fall 2010crwdne2935289:0
CPSU-FORTE-F10S14G39
crwdns2931471:05crwdne2931471:0
crwdns2935297:010crwdne2935297:0
crwdns2947412:06crwdne2947412:0
que tipo de motherboard puedo comprar para una laptop acer aspire 5100-3357
Thank you. I followed the guide as closely as possible. I am installing Windows 76 Ultimate on it again.
Thank you!
a lot of stuff missing in terms of unscrewing certain screws to get the cover off. I got stuck at step 10 because the cover was still attached by various screws.
Maybe I have a different model, but it is for sure an Acer Aspire 5100.
I also broke a lot of connection where screws thread in to, hopefully it goes back together rigidly enough.
It is not neccessary for a full strip down, just to get at the CPU. Access from the main cover, remove fan and heatsink. The CPU can now be removed as in the final steps.
You have to remove the video cable, wifi cables and LCD before you try to remove the touchpad/upper cover. You must also remove two screws from the bottom labeled 10x. In other words, you should complete steps 12 to 16 and remove the 10x screws before attempting to complete steps 9 to 11.