crwdns2915892:0crwdne2915892:0
This step by step guide will show you how to replace the CPU in your Acer Aspire 5100.
crwdns2942213:0crwdne2942213:0
-
-
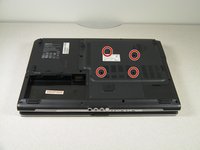
Flip the laptop upside-down.
-
Remove the four screws attached to the large panel.
-
-
-
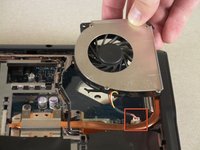
Remove the two screws attached to the fan.
-
-
-
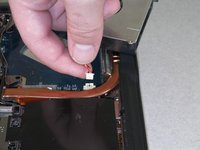
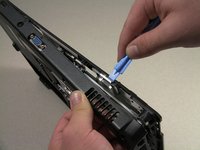
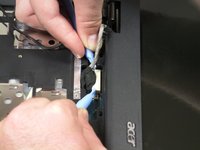
Lift the fan and detach the cable that connects the fan to the motherboard.
-
When detaching the cable, do not pull on the cable itself. Instead, use a small spudger to detach it at the white section that connects it to the motherboard.
-
-
-
Open and push the screen back all the way until it is horizontal with the rest of the laptop.
-
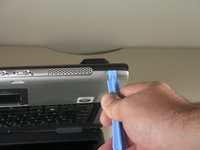
Use an opening tool to remove the panel above the keyboard that has the power button on it.
-
After you have released the tabs, lift up the panel.
-
-
-
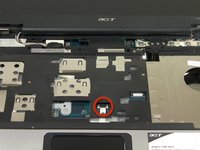
Under the panel, remove the two screws that connect the keyboard to the laptop.
-
-
-
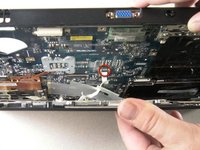
Release the catch on the ribbon socket by sliding the two tabs toward the ribbon.
-
Pull the ribbon under the keyboard to detach it from the motherboard.
-
Remove the keyboard.
do not pull on ribbon it will only break the cable. instead use tool to detach from mother board. i broke mine by pulling ribbon.
useless guide, there are a lot of screws that lock the cover on the laptop and you have never showed them
You do not need to remove the whole cover, in order to replace the keyboard.
The description for this job is right.
The switch plate cover just pops off.
Screws revealed, secure the keyboard.
Unclip the ribbon cable.
Job done
Richard -
-
-
-
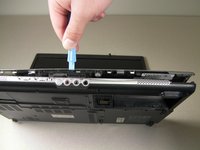
Remove the nine screws from the back edges of the laptop.
-
-
-
-
Open the lid of the laptop and locate the cover that surrounds the keyboard and track pad.
-
Use the spudger to pry open the sides of this cover.
-
-
-
Slightly lift up the cover to see the ribbon connection.
-
Release the catch by sliding the two lugs toward the ribbon, then pull the ribbon to detach it from the motherboard.
-
Lift up the cover from the laptop.
-
-
-
On the cover that was removed, flip it around and locate where the back of the track pad is.
-
Remove the three screws located at the corners.
-
Lift up the bracket that you just unscrewed and remove track pad.
-
-
-
Remove the two screws from each corner beneath the LCD screen.
-
-
-
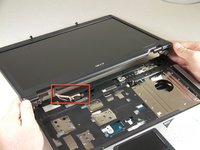
Detach the white rectangle located on the motherboard at the end of the wire connected to the LCD screen.
-
-
-
Flip the laptop upside down.
-
Remove the four screws from the back panel of the laptop.
-
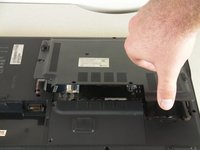
Lift the panel up and set it aside.
-
-
-
Remove the 15 screws from the motherboard.
-
-
-
Flip the laptop upside down.
-
Locate the heat sink, which is the copper "L" shaped component, and unscrew the four screws that connect it to the motherboard.
-
-
-
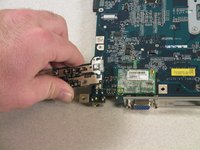
Push out the back of the casing by the VGA connector to remove the motherboard.
-
-
-
Lift up and remove the motherboard from the laptop casing.
-
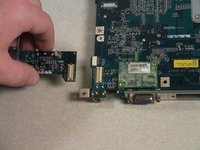
Remove the USB add-on card to use it with the new motherboard.
-
-
-
Loosen the screw to the CPU by rotating counter clockwise. The use of a flat head screwdriver will be needed.
-
-
-
Carefully pull up on the CPU from the circuit board without twisting or rotating as connections may become bent.
-
You now have the CPU, you may inspect it to check for any damages or replacement as necessary
-


To reassemble your device, follow these instructions in reverse order.
To reassemble your device, follow these instructions in reverse order.
crwdns2935221:0crwdne2935221:0
crwdns2935227:0crwdne2935227:0

crwdns2947412:02crwdne2947412:0
Hello sir
Can I switch to cpu amd advanced chip intel or I can not do so
Thank you
Message me on email
rabaharif1993@gmail.com
It is not worth the improvement.
4screws 10mm
dhsttite@hotmail.com - crwdns2934203:0crwdne2934203:0
4 screws 10mm.
dhsttite@hotmail.com - crwdns2934203:0crwdne2934203:0