crwdns2933423:0crwdne2933423:0

crwdns2862623:0crwdne2862623:0
crwdns2942641:0crwdne2942641:0

crwdns2942213:0crwdne2942213:0

  1. crwdns2935201:0crwdne2935201:0 crwdns2935203:0crwdne2935203:0

    : crwdns2935265:01crwdnd2935265:01crwdnd2935265:02crwdne2935265:0 : crwdns2935265:01crwdnd2935265:02crwdnd2935265:02crwdne2935265:0
    • For your safety, unplug all peripheries, discharge the battery below 25%, and power down your device before beginning disassembly.

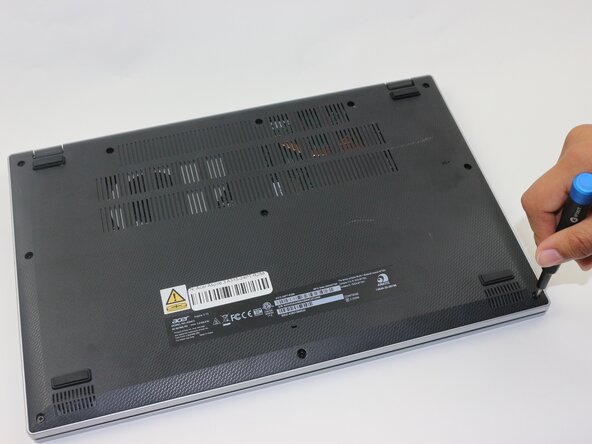
    • Use a Phillips screwdriver to remove the eleven 2 mm screws that secure the lower case.

  2. crwdns2935201:0crwdne2935201:0 crwdns2935203:0crwdne2935203:0

    : crwdns2935265:02crwdnd2935265:01crwdnd2935265:01crwdne2935265:0
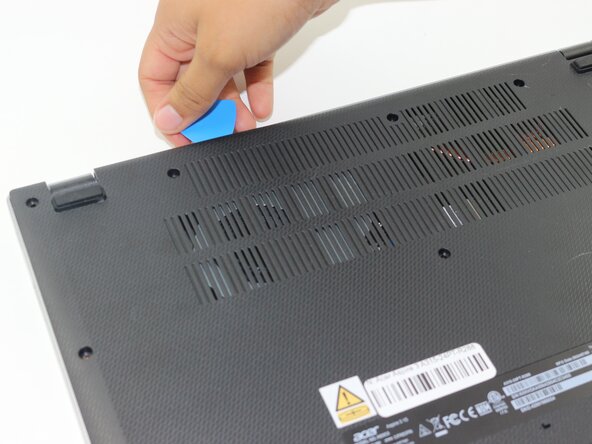
    • Insert an opening pick in the seam between the chassis and the lower case.

    • Slide the opening pick around the entire perimeter, prying every couple of centimeters, to release all of the retaining clips that secure the lower case.

    • Remove the lower case.

  3. crwdns2935201:0crwdne2935201:0 crwdns2935203:0crwdne2935203:0

    : crwdns2935265:03crwdnd2935265:01crwdnd2935265:01crwdne2935265:0
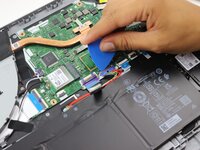
    • Remove the tape on the battery connector using tweezers or your fingers.

  4. crwdns2935201:0crwdne2935201:0 crwdns2935203:0crwdne2935203:0

    : crwdns2935265:04crwdnd2935265:01crwdnd2935265:02crwdne2935265:0 : crwdns2935265:04crwdnd2935265:02crwdnd2935265:02crwdne2935265:0
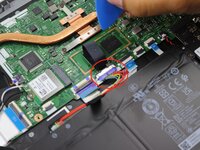
    • Use an opening pick or the flat end of a spudger to gently push the battery connector out of its motherboard socket.

crwdns2935217:0crwdne2935217:0

crwdns2935227:0crwdne2935227:0

Connor

crwdns2935283:003/29/22crwdne2935283:0

14 262 crwdns2915208:0crwdne2915208:0

crwdns2935297:070crwdne2935297:0

crwdns2947412:00crwdne2947412:0

crwdns2917038:0crwdne2917038:0

crwdns2936625:0crwdne2936625:0:

crwdns2936751:024crwdne2936751:0 0

crwdns2936753:07crwdne2936753:0 0

crwdns2936753:030crwdne2936753:0 31

crwdns2942667:0crwdne2942667:0 31