crwdns2915892:0crwdne2915892:0
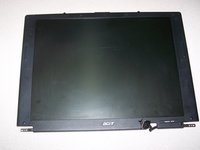
To repair most parts on the Acer Aspire 1410 apart from HDD, RAM or battery it is necessary to disassemble the entire laptop computer. The motherboard is tricky to get to, and components are soldered on, but with perseverance, it can be done.
crwdns2942213:0crwdne2942213:0
-
-
With laptop closed, turn screenside down and remove the battery.
-
Unscrew covers and remove HDD.
-
Unscrew cover and remove RAM.
-
Unscrew and remove cover for fan.
-
-
-
Turn laptop so that hinges are closest to you and remove screw from rear of each hinge.
-
Remove screws securing bottom case to logic board. (It won't come off just yet though)
-
-
-
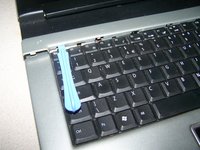
Use a spudger to release the silver and black plastic cover that forms the hinge covers. Start at one side nearest a hinge and work along the rear of the case, there are 5 tabs to release along the keyboard edge.
-
Disconnect LCD cable by lifting straight upwards using the black plastic tabs on the top of the LCD connector. You may need to use a spudger to loosen the connection along the uppermost edge-not along the logicboard.
-
Remove 2 screws from left and right hinges.
-
Remove 2 screws securing topcase to rear of battery tray.
-
-
-
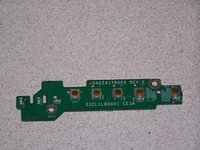
Remove 2 screws securing power board to logicboard.
-
Lift LCD screen from bottom case.
-
-
-
-
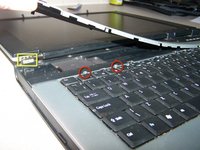
Remove 2 screws securing the keyboard to case.
-
Place ducks in sink, make sure to disinfect sink afterwards.
-
-
-
Flip keyboard over to cover trackpad. Disconnect keyboard.
-
-
-
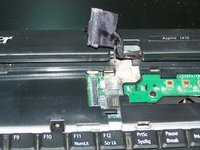
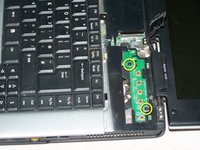
Disconnect trackpad.
-
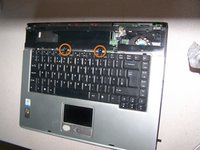
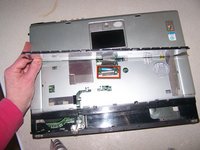
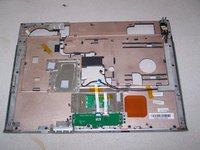
Use a spudger to ease topcase free of bottom case. Slide topcase toward trackpad and then lift up. Resistance can be felt from magnets on topcase.
-
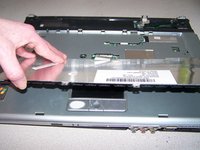
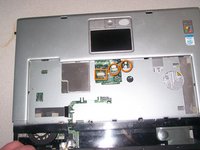
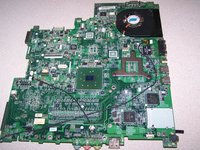
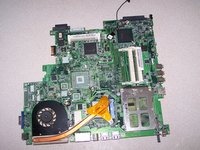
Your laptop should now look like this; middle photo is the remaining logicboard and bottom case, the last photo is the topcase cover.
-
-
-
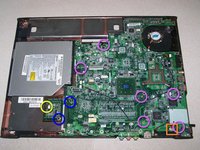
Remove logicboard screws.
-
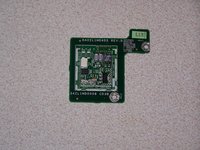
Remove the 2 screws securing the modem.
-
Disconnect wire from the modem to the logicboard.
-
Disconnect the speaker wire form the logicboard.
-
-
-
Use hex no.5 tool to unscrew 2 bolts from port next ac-in jack.
-
-
-
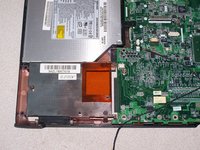
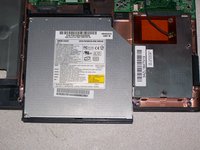
Slide DVD drive from logicboard frame.
-
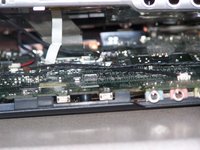
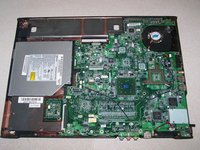
Last 2 photo's show top of logicboard and underside of logicboard.
-


To reassemble your device, follow these instructions in reverse order. Remember to place logicboard in ac power connection end in first
To reassemble your device, follow these instructions in reverse order. Remember to place logicboard in ac power connection end in first
crwdns2935221:0crwdne2935221:0
crwdns2935229:022crwdne2935229:0

crwdns2915084:0crwdne2915084:0

Master Techs crwdns2935289:0Master Techscrwdne2935289:0
Community
crwdns2931471:0328crwdne2931471:0
crwdns2935297:01.440crwdne2935297:0
crwdns2947412:03crwdne2947412:0
superb thanx thanx thanx
Great start, but this is not my 1410 and there is no selection for other models. The one I have is much smaller. Mine is model 1410-2817.
Great effort but my model does not mach, much smaller, 1410-2817.