crwdns2933423:0crwdne2933423:0
crwdns2947577:0crwdnd2947577:0crwdne2947577:0

Acer AL1916 VGA Input Replacement

crwdns2942213:0crwdne2942213:0

    1. Acer AL1916 VGA Input Replacement, Stand: crwdns2935265:01crwdnd2935265:01crwdnd2935265:01crwdne2935265:0
      • Lay the monitor on a flat surface so that the back is facing up.

      crwdns2952109:0crwdne2952109:0

      crwdns2917038:0crwdne2917038:0

    2. Acer AL1916 VGA Input Replacement: crwdns2935265:02crwdnd2935265:01crwdnd2935265:02crwdne2935265:0 Acer AL1916 VGA Input Replacement: crwdns2935265:02crwdnd2935265:02crwdnd2935265:02crwdne2935265:0
      • Grab the hinge cover with both hands on either side of the stand.

      • Squeeze inwards with your thumbs and fingers and lift up to remove the hinge cover.

      crwdns2952109:0crwdne2952109:0

      crwdns2917038:0crwdne2917038:0

    3. Acer AL1916 VGA Input Replacement: crwdns2935265:03crwdnd2935265:01crwdnd2935265:02crwdne2935265:0 Acer AL1916 VGA Input Replacement: crwdns2935265:03crwdnd2935265:02crwdnd2935265:02crwdne2935265:0
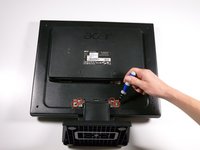
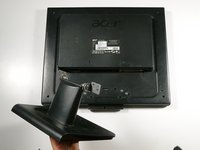
      • Remove the four 12.1 mm Phillips #2 screws that hold the stand to the monitor.

      • Support the monitor while removing the screws to prevent the monitor from falling.

      • Lift up to detach the stand.

      crwdns2952109:0crwdne2952109:0
      crwdns2917038:0crwdne2917038:0

    1. Acer AL1916 VGA Input Replacement, Outer Case: crwdns2935265:04crwdnd2935265:01crwdnd2935265:02crwdne2935265:0 Acer AL1916 VGA Input Replacement, Outer Case: crwdns2935265:04crwdnd2935265:02crwdnd2935265:02crwdne2935265:0
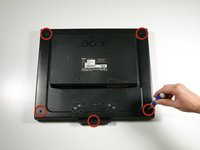
      • Remove the five 9.5 mm Phillips #2 screws located around the perimeter of the monitor.

      crwdns2952109:0crwdne2952109:0
      crwdns2917038:0crwdne2917038:0

    2. Acer AL1916 VGA Input Replacement: crwdns2935265:05crwdnd2935265:01crwdnd2935265:03crwdne2935265:0 Acer AL1916 VGA Input Replacement: crwdns2935265:05crwdnd2935265:02crwdnd2935265:03crwdne2935265:0 Acer AL1916 VGA Input Replacement: crwdns2935265:05crwdnd2935265:03crwdnd2935265:03crwdne2935265:0
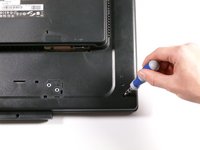
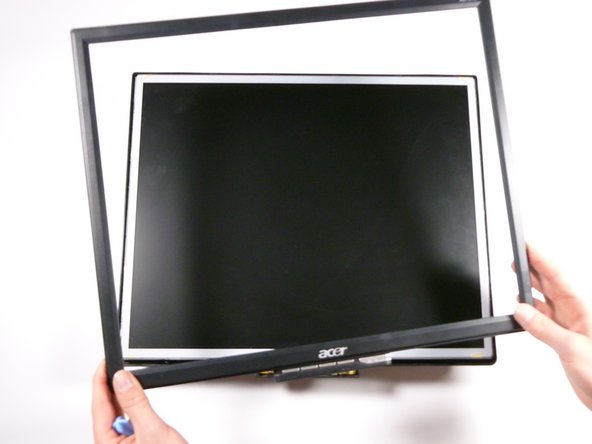
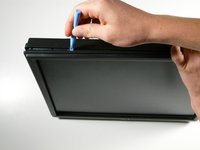
      • Starting at the corner of the monitor, wedge the small plastic opening tool between the back cover and the display bezel.

      • Tilt the plastic opening tool up to separate the back cover from the display bezel.

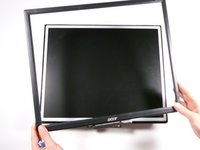
      • Continue around the perimeter of the monitor until the display bezel comes off.

      • A reasonable amount of force is necessary to detach the back cover from the display bezel.

      crwdns2952109:0crwdne2952109:0

      crwdns2917038:0crwdne2917038:0

    3. Acer AL1916 VGA Input Replacement: crwdns2935265:06crwdnd2935265:01crwdnd2935265:02crwdne2935265:0 Acer AL1916 VGA Input Replacement: crwdns2935265:06crwdnd2935265:02crwdnd2935265:02crwdne2935265:0
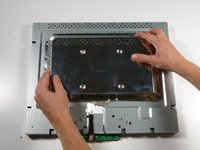
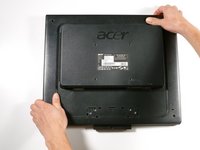
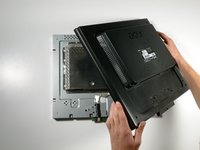
      • Reposition the monitor so that the back is facing up.

      • Grab the corners of the monitor and jiggle them upwards to detach the back cover from the inside of the monitor.

      • Lift the back cover up.

      crwdns2952109:0crwdne2952109:0

      crwdns2917038:0crwdne2917038:0

    1. Acer AL1916 VGA Input Replacement, EMI Shield: crwdns2935265:07crwdnd2935265:01crwdnd2935265:02crwdne2935265:0 Acer AL1916 VGA Input Replacement, EMI Shield: crwdns2935265:07crwdnd2935265:02crwdnd2935265:02crwdne2935265:0
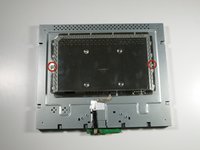
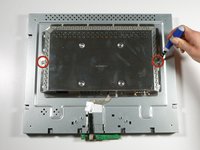
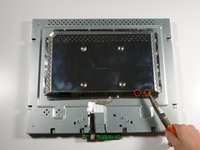
      • Remove the two 5.7 mm Phillips #2 screws located on either side of the EMI shield.

      crwdns2952109:0crwdne2952109:0
      crwdns2917038:0crwdne2917038:0

    2. Acer AL1916 VGA Input Replacement: crwdns2935265:08crwdnd2935265:01crwdnd2935265:02crwdne2935265:0 Acer AL1916 VGA Input Replacement: crwdns2935265:08crwdnd2935265:02crwdnd2935265:02crwdne2935265:0
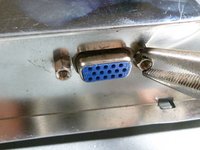
      • Using a nut driver (or if necessary, needle-nose pliers), remove the two nuts on either side of the VGA input.

      crwdns2952109:0crwdne2952109:0

      crwdns2917038:0crwdne2917038:0

    3. Acer AL1916 VGA Input Replacement: crwdns2935265:09crwdnd2935265:01crwdnd2935265:03crwdne2935265:0 Acer AL1916 VGA Input Replacement: crwdns2935265:09crwdnd2935265:02crwdnd2935265:03crwdne2935265:0 Acer AL1916 VGA Input Replacement: crwdns2935265:09crwdnd2935265:03crwdnd2935265:03crwdne2935265:0
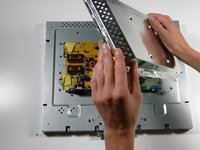
      • Grab the metal casing by the sides and slide it down towards the bottom of the monitor.

      • Lift up to remove the metal casing.

      • Beware, metal casing is sharp!

      crwdns2952109:0crwdne2952109:0
      crwdns2917038:0crwdne2917038:0

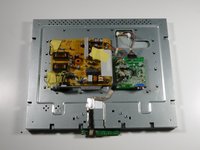
    1. Acer AL1916 VGA Input Replacement, Motherboard: crwdns2935265:010crwdnd2935265:01crwdnd2935265:02crwdne2935265:0 Acer AL1916 VGA Input Replacement, Motherboard: crwdns2935265:010crwdnd2935265:02crwdnd2935265:02crwdne2935265:0
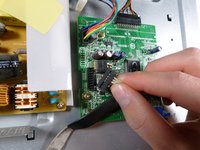
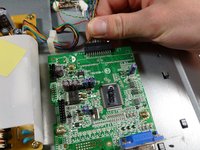
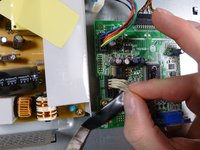
      • Remove the beige control cable to the left of the VGA input by pulling it up.

      crwdns2952109:0crwdne2952109:0
      crwdns2917038:0crwdne2917038:0

    2. Acer AL1916 VGA Input Replacement: crwdns2935265:011crwdnd2935265:01crwdnd2935265:02crwdne2935265:0 Acer AL1916 VGA Input Replacement: crwdns2935265:011crwdnd2935265:02crwdnd2935265:02crwdne2935265:0
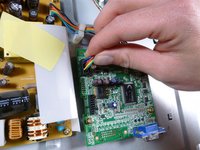
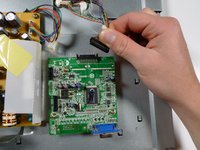
      • Remove the rainbow-colored power cable by pulling it straight up.

      crwdns2952109:0crwdne2952109:0

      crwdns2917038:0crwdne2917038:0

    3. Acer AL1916 VGA Input Replacement: crwdns2935265:012crwdnd2935265:01crwdnd2935265:02crwdne2935265:0 Acer AL1916 VGA Input Replacement: crwdns2935265:012crwdnd2935265:02crwdnd2935265:02crwdne2935265:0
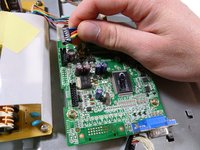
      • Remove the display cable located at the top of the motherboard by pulling it out towards the top of the monitor.

      crwdns2952109:0crwdne2952109:0

      crwdns2917038:0crwdne2917038:0

    4. Acer AL1916 VGA Input Replacement: crwdns2935265:013crwdnd2935265:01crwdnd2935265:03crwdne2935265:0 Acer AL1916 VGA Input Replacement: crwdns2935265:013crwdnd2935265:02crwdnd2935265:03crwdne2935265:0 Acer AL1916 VGA Input Replacement: crwdns2935265:013crwdnd2935265:03crwdnd2935265:03crwdne2935265:0
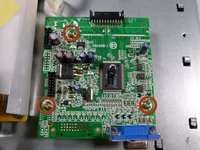
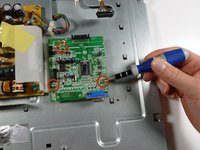
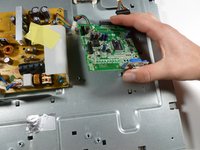
      • Remove the three 7.7 mm Phillips #2 screws from the motherboard, and take out the motherboard by lifting it up.

      crwdns2952109:0crwdne2952109:0
      crwdns2917038:0crwdne2917038:0

    1. Acer AL1916 VGA Input Replacement, VGA Input: crwdns2935265:014crwdnd2935265:01crwdnd2935265:02crwdne2935265:0 Acer AL1916 VGA Input Replacement, VGA Input: crwdns2935265:014crwdnd2935265:02crwdnd2935265:02crwdne2935265:0
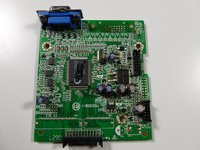
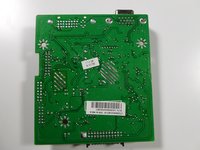
      • Set the circuit board down on its own, removed from the rest of the monitor.

      • Flip the circuit board over so that the VGA input is facing upwards.

      crwdns2952109:0crwdne2952109:0
      crwdns2917038:0crwdne2917038:0

    2. Acer AL1916 VGA Input Replacement: crwdns2935265:015crwdnd2935265:01crwdnd2935265:03crwdne2935265:0 Acer AL1916 VGA Input Replacement: crwdns2935265:015crwdnd2935265:02crwdnd2935265:03crwdne2935265:0 Acer AL1916 VGA Input Replacement: crwdns2935265:015crwdnd2935265:03crwdnd2935265:03crwdne2935265:0
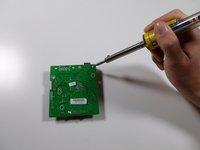
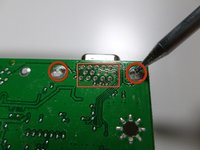
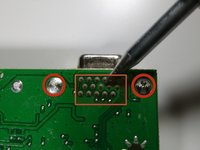
      • Using the soldering iron, desolder the VGA input at the indicated locations.

      • Solder the new VGA input into the circuit board at the same locations.

      • Click here for more information on component-level soldering.

      crwdns2952109:0crwdne2952109:0

      crwdns2917038:0crwdne2917038:0

crwdns2915888:0crwdne2915888:0

To reassemble your device, follow these instructions in reverse order.

crwdns2935221:0crwdne2935221:0

Taylor Atterbury

crwdns2935283:010/06/11crwdne2935283:0

747 crwdns2915208:0crwdne2915208:0

crwdns2935297:03crwdne2935297:0

crwdns2935287:0crwdne2935287:0

Cal Poly, Team 20-26, Maness Fall 2011 crwdns2935289:0Cal Poly, Team 20-26, Maness Fall 2011crwdne2935289:0

CPSU-MANESS-F11S20G26

crwdns2931471:04crwdne2931471:0

crwdns2935297:084crwdne2935297:0
crwdns2947412:00crwdne2947412:0

crwdns2917038:0crwdne2917038:0

crwdns2936625:0crwdne2936625:0:

crwdns2936751:024crwdne2936751:0 4

crwdns2936753:07crwdne2936753:0 12

crwdns2936753:030crwdne2936753:0 41

crwdns2942667:0crwdne2942667:0 3,872