crwdns2915892:0crwdne2915892:0
This guide will show you how to replace the motherboard in the ATT Trek HD tablet. During this process, take your time and make sure to disconnect all parts before trying to remove the motherboard. Any damage done to the motherboard may cause the device to not work properly. Make sure to use the plastic opening tool when possible.
crwdns2942213:0crwdne2942213:0
-
-
To separate the screen from the back panel, run the plastic opening tool along the outer edge of the device.
-
-
-
Pull the screen away from the back panel.
-
-
-
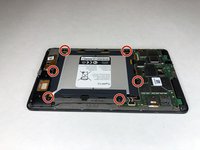
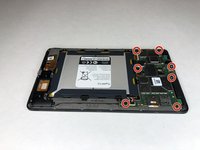
Use a Phillips #00 screwdriver to remove the six 2.5 mm screws located around the perimeter of the battery.
-
-
-
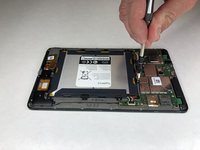
Use the plastic opening tool to disconnect the black battery connector.
-
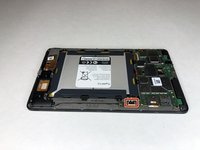
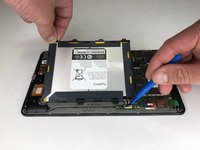
Gently lift the battery out of the device.
-
-
-
-
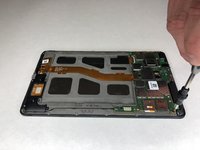
Using a Phillips #00 screwdriver, remove the seven 1 mm screws on the green perimeter of the motherboard.
-
-
-
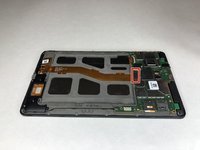
Use the plastic opening tool to disconnect the large gold strip underneath the metal plate from the motherboard.
-
-
-
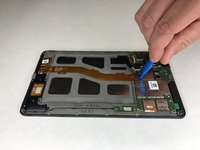
Use the plastic opening tool to disconnect the front and back cameras from motherboard.
-
-
crwdns2935267:0crwdne2935267:0Tweezers$3.99
-
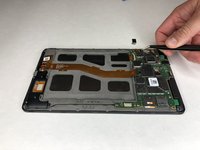
Use angled tweezers to pry up the black tab.
-
Use the angled tweezers to pull out the gold connector.
-
-
-
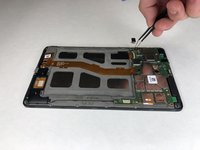
Use the angled tweezers to disconnect the gold connector.
-
-
-
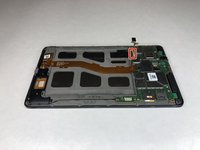
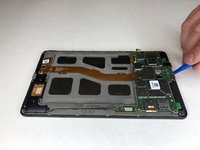
Use the plastic opening tool to disconnect the black connectors on each side of the motherboard.
-
-
-
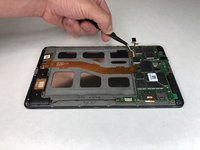
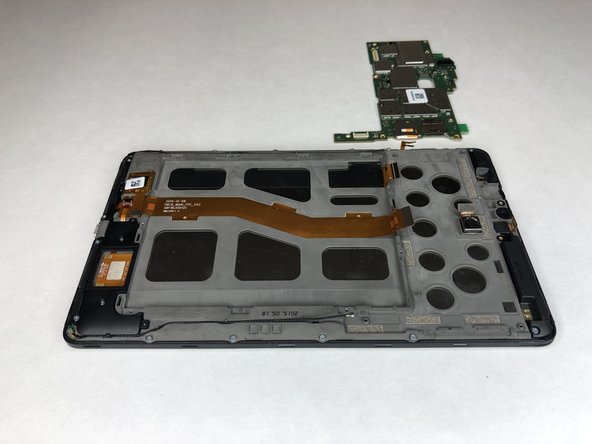
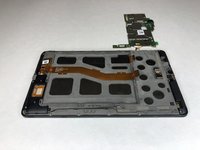
Use the plastic opening tool to lift the motherboard out of place.
-


To reassemble your device, follow these instructions in reverse order.
To reassemble your device, follow these instructions in reverse order.
crwdns2915084:0crwdne2915084:0

University of Alabama, Team S1-G3, Bedsole Spring 2019 crwdns2935289:0University of Alabama, Team S1-G3, Bedsole Spring 2019crwdne2935289:0
UA-BEDSOLE-S19S1G3
crwdns2931471:04crwdne2931471:0
crwdns2935297:06crwdne2935297:0