crwdns2933423:0crwdne2933423:0

ASUS X550LB-DS71 Display Panel Replacement

crwdns2942213:0crwdne2942213:0

  1. ASUS X550LB-DS71 Display Panel Replacement, Display Panel: crwdns2935265:01crwdnd2935265:01crwdnd2935265:03crwdne2935265:0 ASUS X550LB-DS71 Display Panel Replacement, Display Panel: crwdns2935265:01crwdnd2935265:02crwdnd2935265:03crwdne2935265:0 ASUS X550LB-DS71 Display Panel Replacement, Display Panel: crwdns2935265:01crwdnd2935265:03crwdnd2935265:03crwdne2935265:0
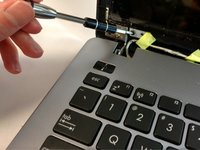
    • Flip open the laptop with the screen facing towards you.

    • Using the plastic opening tool, remove the square tape from the marked locations.

    • Use the Phillips #0 Screwdriver to remove the two 2mm screws from those locations.

  2. ASUS X550LB-DS71 Display Panel Replacement: crwdns2935265:02crwdnd2935265:01crwdnd2935265:02crwdne2935265:0 ASUS X550LB-DS71 Display Panel Replacement: crwdns2935265:02crwdnd2935265:02crwdnd2935265:02crwdne2935265:0
    • Using the plastic opening tool, open the front cover of the laptop.

    • It is recommended that you start from a corner and run the tool along the edge of the cover.

    • Be careful not to bend or crack the cover.

  3. ASUS X550LB-DS71 Display Panel Replacement: crwdns2935265:03crwdnd2935265:01crwdnd2935265:03crwdne2935265:0 ASUS X550LB-DS71 Display Panel Replacement: crwdns2935265:03crwdnd2935265:02crwdnd2935265:03crwdne2935265:0 ASUS X550LB-DS71 Display Panel Replacement: crwdns2935265:03crwdnd2935265:03crwdnd2935265:03crwdne2935265:0
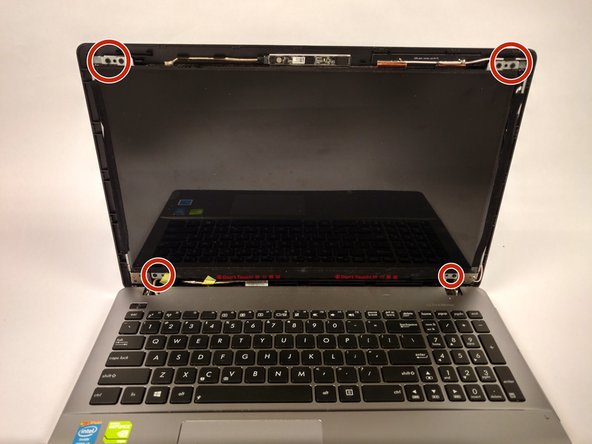
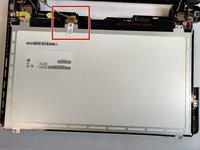
    • Peel off the tape located on the left and right side of the display monitor.

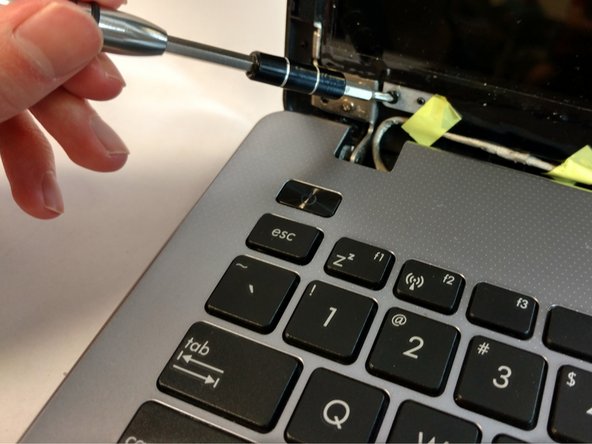
    • Use the Phillips #0 screwdriver to remove the screws at the marked locations in each corner of the display.

  4. ASUS X550LB-DS71 Display Panel Replacement: crwdns2935265:04crwdnd2935265:01crwdnd2935265:03crwdne2935265:0 ASUS X550LB-DS71 Display Panel Replacement: crwdns2935265:04crwdnd2935265:02crwdnd2935265:03crwdne2935265:0 ASUS X550LB-DS71 Display Panel Replacement: crwdns2935265:04crwdnd2935265:03crwdnd2935265:03crwdne2935265:0
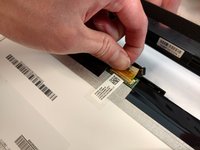
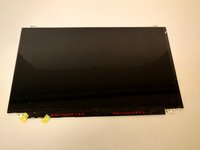
    • Place the display monitor face down to expose the ribbon connector.

    • Remove the ribbon connector to separate the display monitor from the rest of the device.

crwdns2915888:0crwdne2915888:0

To reassemble your device, follow these instructions in reverse order.

Nathan Dyer

crwdns2935283:009/25/17crwdne2935283:0

550 crwdns2915208:0crwdne2915208:0

crwdns2935297:05crwdne2935297:0

crwdns2915084:0crwdne2915084:0

USF Tampa, Team S16-G1, Eyestone Fall 2017 crwdns2935289:0USF Tampa, Team S16-G1, Eyestone Fall 2017crwdne2935289:0

USFT-EYESTONE-F17S16G1

crwdns2931471:04crwdne2931471:0

crwdns2935297:05crwdne2935297:0

crwdns2944067:00crwdne2944067:0

crwdns2917038:0crwdne2917038:0

crwdns2936625:0crwdne2936625:0:

crwdns2936751:024crwdne2936751:0 0

crwdns2936753:07crwdne2936753:0 3

crwdns2936753:030crwdne2936753:0 12

crwdns2942667:0crwdne2942667:0 992