crwdns2915892:0crwdne2915892:0
This guide entails how to quickly and correctly replace the LED board for the lower led lights on the front of an ASUS laptop. The LED board is one of the simplest parts to replace on the inside of the ASUS laptop so don't be intimidated by the task. With the help of this guide you will be able to replace them without a hitch.
crwdns2942213:0crwdne2942213:0
-
-
Use the Phillips #00 screwdriver to remove the seven 90mm screws.
-
Use the Phillips #00 screwdriver to remove the four 50mm screws.
-
-
-
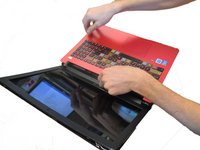
Next, use the plastic opening tool to carefully pop off the keyboard cover panel.
-
-
-
crwdns2935267:0crwdne2935267:0Tweezers$4.99
-
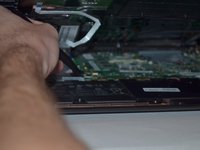
Lift palm rest and unplug keyboard cable and touchpad cable using tweezers. After these two cables have been unplugged you can remove the keyboard cover panel.
-
-
-
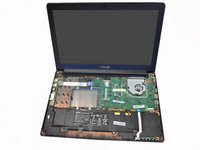
Lift Palm Rest away.
-
Replace with new palm rest.
-
-
-
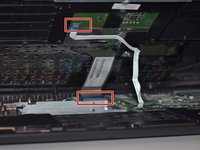
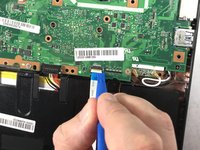
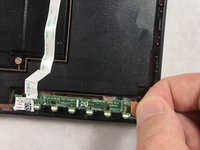
Use the plastic opening tool to flip up the small clamp and pull out the ribbon cable.
-
-
-
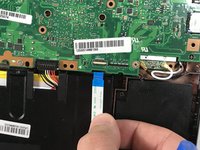
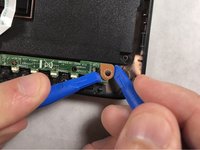
Use 1 or 2 plastic opening tools to push down the small black plastic clips.
-
Pull the board up and out.
-


To reassemble your device, follow these instructions in reverse order.
crwdns2935221:0crwdne2935221:0
crwdns2935227:0crwdne2935227:0
crwdns2935287:0crwdne2935287:0

UMass Dartmouth, Team S5-G6, Gulbrandsen Fall 2018 crwdns2935289:0UMass Dartmouth, Team S5-G6, Gulbrandsen Fall 2018crwdne2935289:0
UMASSD-GULBRANDSEN-F18S5G6
crwdns2931471:03crwdne2931471:0
crwdns2935297:05crwdne2935297:0