crwdns2915892:0crwdne2915892:0
The IO board in the ASUS X42J contains vital ports including power, ethernet, and one USB port. This is the very last thing that can come out of this device, so this will be the most time consuming guide for this device.
crwdns2942213:0crwdne2942213:0
-
crwdns2935267:0crwdne2935267:0Metal Spudger$2.99
-
Using a Spudger, gently pry up the keyboard.
-
-
crwdns2935267:0crwdne2935267:0Nylon Tipped Tweezers$4.99
-
Rotate the keyboard to face downward.
-
Pull out the blue wiring connection. Use tweezers to make it easier to remove.
-
-
-
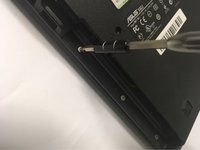
Use the Phillips #0 screwdriver to remove the two screws on the back of the laptop.
-
-
-
Slide the disk drive out of the device.
-
-
-
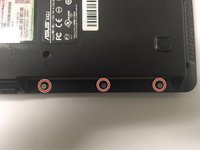
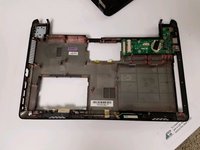
Remove all screws located on the bottom plate of the laptop, beginning with the three located underneath the disc drive.
-
-
-
-
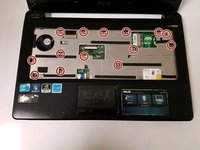
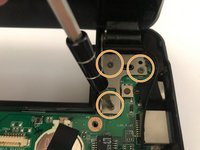
Rotate the laptop until it is sitting face up and extract all screws exposed by removing the keyboard.
-
-
crwdns2935267:0crwdne2935267:0Metal Spudger$2.99
-
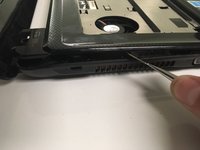
Pull up on the front panel using the spudger until the front panel separates from the bottom panel.
-
-
-
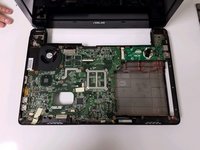
Unscrew and remove the marked screws.
-
-
-
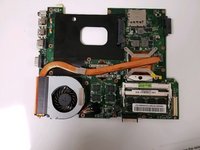
Remove the motherboard from the device.
-
-
-
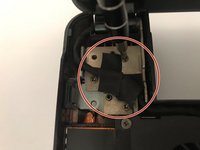
Remove the tape from the screen connector.
-
Remove the screws from the connector.
-
-
-
Pull the screen away from the mount.
-


To reassemble your device, follow these instructions in reverse order.
crwdns2935287:0crwdne2935287:0

University of North Texas, Team S6-G2, Thompson Fall 2018 crwdns2935289:0University of North Texas, Team S6-G2, Thompson Fall 2018crwdne2935289:0
UNT-THOMPSON-F18S6G2
crwdns2931471:04crwdne2931471:0
crwdns2935297:06crwdne2935297:0