crwdns2933423:0crwdne2933423:0

ASUS VivoBook S400C Display Assembly Replacement

crwdns2942213:0crwdne2942213:0

  1. ASUS VivoBook S400C Display Assembly Replacement, Remove the Bottom Cover: crwdns2935265:01crwdnd2935265:01crwdnd2935265:01crwdne2935265:0
    • Flip the device over and remove the ten 5.7 mm screws with a Phillips #0 screwdriver.

  2. ASUS VivoBook S400C Display Assembly Replacement: crwdns2935265:02crwdnd2935265:01crwdnd2935265:02crwdne2935265:0 ASUS VivoBook S400C Display Assembly Replacement: crwdns2935265:02crwdnd2935265:02crwdnd2935265:02crwdne2935265:0
    • Use a spudger or your fingers to go around and lift the edges and release the back panel.

  3. ASUS VivoBook S400C Display Assembly Replacement, Disconnect the Battery: crwdns2935265:03crwdnd2935265:01crwdnd2935265:01crwdne2935265:0
    • Using a spudger, lift up the plug connecting the battery to the motherboard.

  4. ASUS VivoBook S400C Display Assembly Replacement, Heat Shield: crwdns2935265:04crwdnd2935265:01crwdnd2935265:02crwdne2935265:0 ASUS VivoBook S400C Display Assembly Replacement, Heat Shield: crwdns2935265:04crwdnd2935265:02crwdnd2935265:02crwdne2935265:0
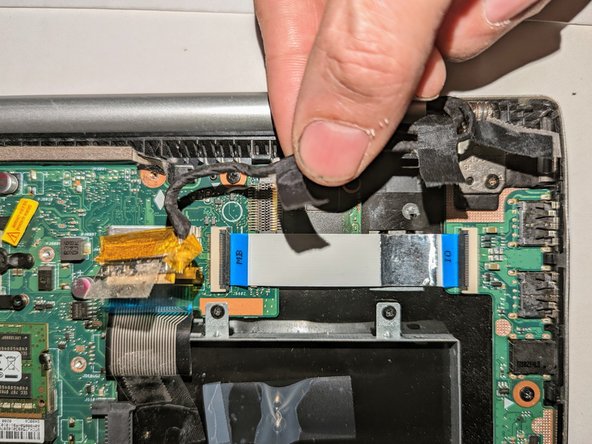
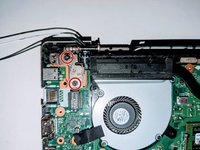
    • Remove the black shield covering the display connector and the heat sink.

    • You may need to use double-sided adhesive tape to resecure the shield.

  5. ASUS VivoBook S400C Display Assembly Replacement, Display Assembly: crwdns2935265:05crwdnd2935265:01crwdnd2935265:01crwdne2935265:0
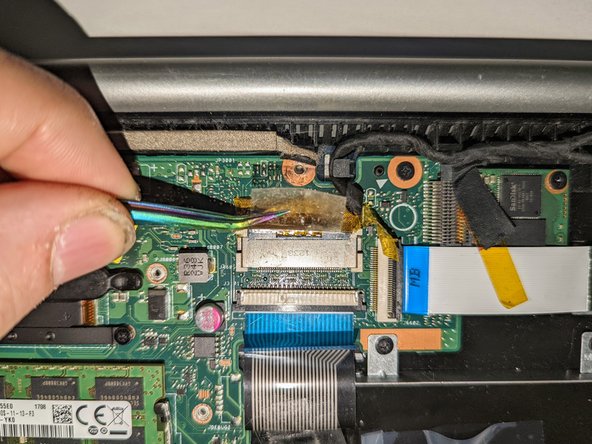
    • Remove the black tape securing the keyboard ribbon cable to the display connector.

    • Fold the ribbon cable the opposite way, resecuring it to the hard drive to keep it out of the way.

  6. ASUS VivoBook S400C Display Assembly Replacement: crwdns2935265:06crwdnd2935265:01crwdnd2935265:02crwdne2935265:0 ASUS VivoBook S400C Display Assembly Replacement: crwdns2935265:06crwdnd2935265:02crwdnd2935265:02crwdne2935265:0
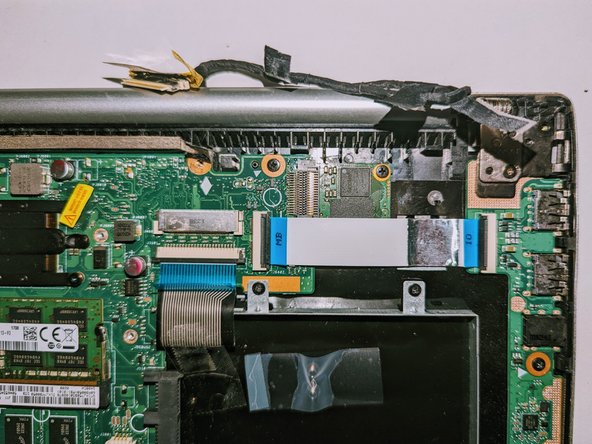
    • Peel off the clear tape from the motherboard display connector.

  7. ASUS VivoBook S400C Display Assembly Replacement: crwdns2935265:07crwdnd2935265:01crwdnd2935265:02crwdne2935265:0 ASUS VivoBook S400C Display Assembly Replacement: crwdns2935265:07crwdnd2935265:02crwdnd2935265:02crwdne2935265:0
    • Position spudgers on the white tabs on either side of the connector and push evenly to unplug the display.

  8. ASUS VivoBook S400C Display Assembly Replacement: crwdns2935265:08crwdnd2935265:01crwdnd2935265:03crwdne2935265:0 ASUS VivoBook S400C Display Assembly Replacement: crwdns2935265:08crwdnd2935265:02crwdnd2935265:03crwdne2935265:0 ASUS VivoBook S400C Display Assembly Replacement: crwdns2935265:08crwdnd2935265:03crwdnd2935265:03crwdne2935265:0
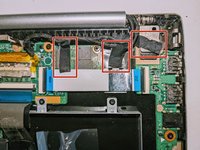
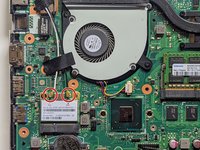
    • Peel off the three pieces of black tape securing the display cable to the motherboard.

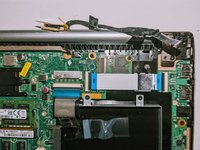
    • Deroute the cable from the channel it sits in.

    • Move the cable to the side, out of the way.

  9. ASUS VivoBook S400C Display Assembly Replacement: crwdns2935265:09crwdnd2935265:01crwdnd2935265:03crwdne2935265:0 ASUS VivoBook S400C Display Assembly Replacement: crwdns2935265:09crwdnd2935265:02crwdnd2935265:03crwdne2935265:0 ASUS VivoBook S400C Display Assembly Replacement: crwdns2935265:09crwdnd2935265:03crwdnd2935265:03crwdne2935265:0
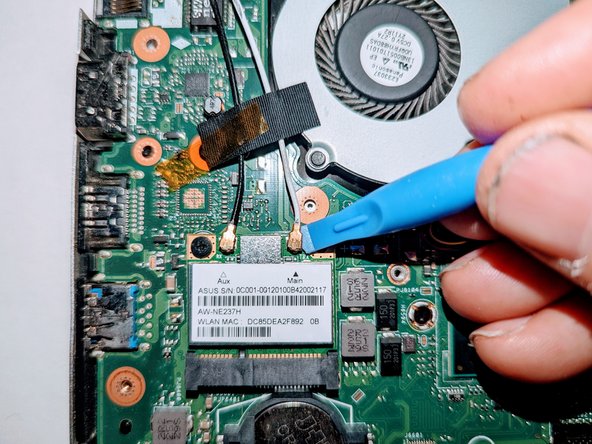
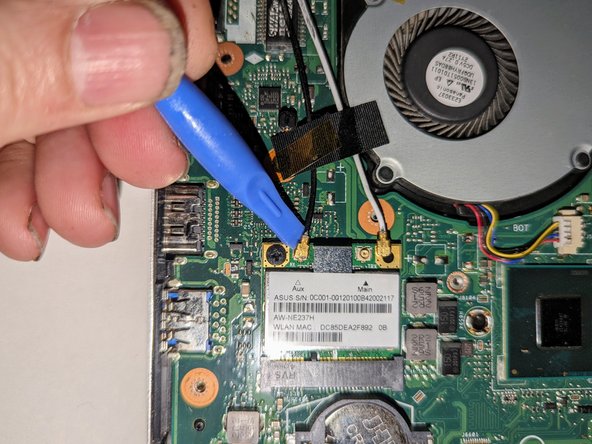
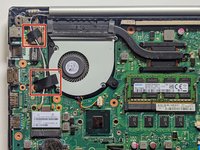
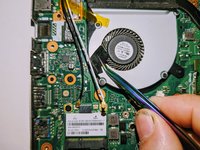
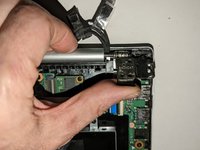
    • Use a spudger to release the cables from the wifi card.

  10. ASUS VivoBook S400C Display Assembly Replacement: crwdns2935265:010crwdnd2935265:01crwdnd2935265:03crwdne2935265:0 ASUS VivoBook S400C Display Assembly Replacement: crwdns2935265:010crwdnd2935265:02crwdnd2935265:03crwdne2935265:0 ASUS VivoBook S400C Display Assembly Replacement: crwdns2935265:010crwdnd2935265:03crwdnd2935265:03crwdne2935265:0
    • Lift the tapes securing the wires to the motherboard.

    • Move the wires to the side out of the way.

  11. ASUS VivoBook S400C Display Assembly Replacement, Disconnect the Hinges: crwdns2935265:011crwdnd2935265:01crwdnd2935265:02crwdne2935265:0 ASUS VivoBook S400C Display Assembly Replacement, Disconnect the Hinges: crwdns2935265:011crwdnd2935265:02crwdnd2935265:02crwdne2935265:0
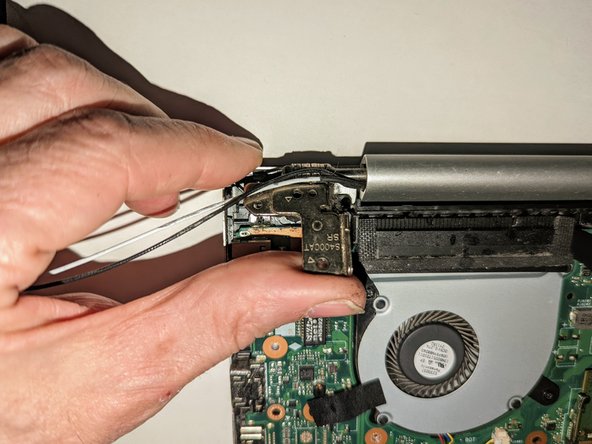
    • Remove the two screws securing the hinge on the left.

    • Pry the hinge up by hand to a 90 degree angle.

  12. ASUS VivoBook S400C Display Assembly Replacement: crwdns2935265:012crwdnd2935265:01crwdnd2935265:02crwdne2935265:0 ASUS VivoBook S400C Display Assembly Replacement: crwdns2935265:012crwdnd2935265:02crwdnd2935265:02crwdne2935265:0
    • Remove the two screws securing the hinge on the right.

    • Pry the hinge up by hand to a 90 degree angle.

  13. ASUS VivoBook S400C Display Assembly Replacement, Remove the Display: crwdns2935265:013crwdnd2935265:01crwdnd2935265:03crwdne2935265:0 ASUS VivoBook S400C Display Assembly Replacement, Remove the Display: crwdns2935265:013crwdnd2935265:02crwdnd2935265:03crwdne2935265:0 ASUS VivoBook S400C Display Assembly Replacement, Remove the Display: crwdns2935265:013crwdnd2935265:03crwdnd2935265:03crwdne2935265:0
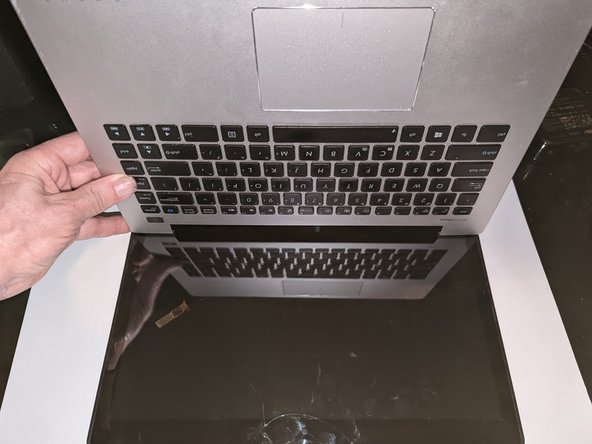
    • Lift the base of the laptop from the front.

    • Raise it to a 90 degree angle.

    • Slide it forward slightly to clear the hinges.

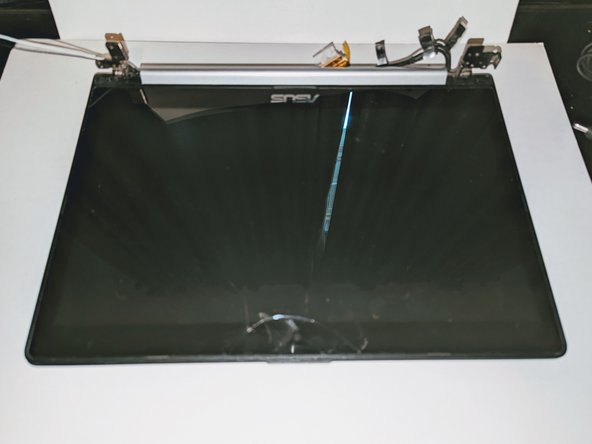
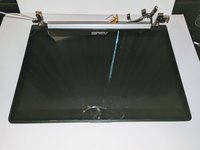
    • The display is now free.

crwdns2915888:0crwdne2915888:0

To reassemble your device, follow these instructions in reverse order.

Jerry Wheeler

crwdns2935283:003/21/22crwdne2935283:0

58 494 crwdns2915208:0crwdne2915208:0

crwdns2935297:069crwdne2935297:0

crwdns2915084:0crwdne2915084:0

Oregonians crwdns2935289:0Oregonianscrwdne2935289:0

Community

crwdns2931471:08crwdne2931471:0

crwdns2935297:0176crwdne2935297:0

crwdns2944067:00crwdne2944067:0

crwdns2917038:0crwdne2917038:0

crwdns2936625:0crwdne2936625:0:

crwdns2936751:024crwdne2936751:0 2

crwdns2936753:07crwdne2936753:0 7

crwdns2936753:030crwdne2936753:0 12

crwdns2942667:0crwdne2942667:0 245