crwdns2933423:0crwdne2933423:0

ASUS VG248 Disassembly

crwdns2942213:0crwdne2942213:0

  1. ASUS VG248 Disassembly, ASUS VG248 Disassembly: crwdns2935265:01crwdnd2935265:01crwdnd2935265:02crwdne2935265:0 ASUS VG248 Disassembly, ASUS VG248 Disassembly: crwdns2935265:01crwdnd2935265:02crwdnd2935265:02crwdne2935265:0
    • Before you begin, lay the monitor face down on a smooth, clean surface.

    • Four rubbery covers hide four screws in the rear of the monitor.

    • Pry out the plastic covers with a stiff pointed tool, like a metal spudger.

  2. ASUS VG248 Disassembly: crwdns2935265:02crwdnd2935265:01crwdnd2935265:01crwdne2935265:0
    • Remove the four 13.4 mm Philips #1 screws securing the monitor stand.

  3. ASUS VG248 Disassembly: crwdns2935265:03crwdnd2935265:01crwdnd2935265:02crwdne2935265:0 ASUS VG248 Disassembly: crwdns2935265:03crwdnd2935265:02crwdnd2935265:02crwdne2935265:0
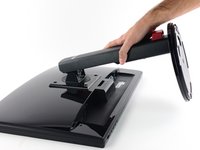
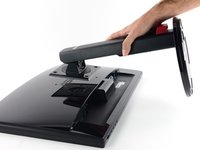
    • Remove the stand from the display.

  4. ASUS VG248 Disassembly: crwdns2935265:04crwdnd2935265:01crwdnd2935265:02crwdne2935265:0 ASUS VG248 Disassembly: crwdns2935265:04crwdnd2935265:02crwdnd2935265:02crwdne2935265:0
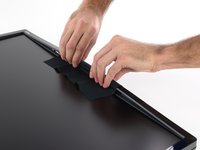
    • The display bezel is held to the rear case by plastic clips that can be released by pulling straight up on the bezel.

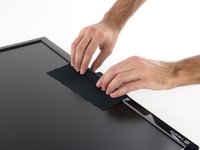
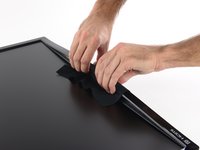
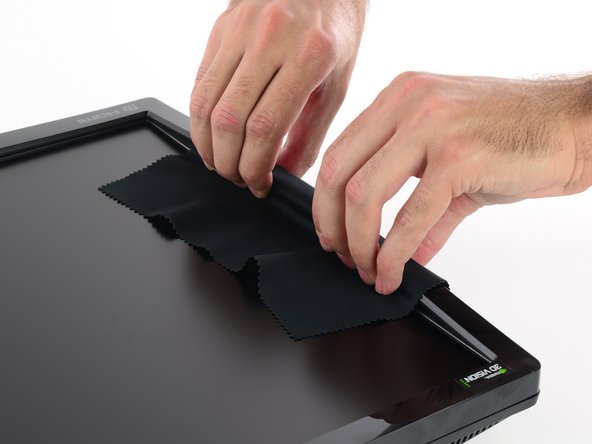
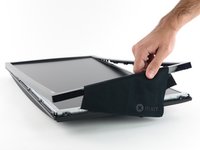
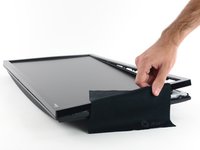
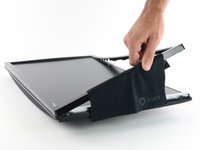
    • Rather than use any prying tools that could damage the LCD, it's best to just pull with your fingers. A thin cloth will both protect your fingertips and prevent you from smudging the LCD.

    • Lay the cloth over one of the long edges of the display.

    • Grip the side of the bezel through the cloth and lift straight up. A few clips in the center will pop free.

    • Be careful to pull straight up, and not pry against the display. Pushing down on the display could damage it.

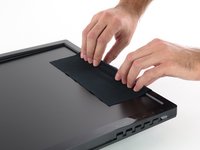
  5. ASUS VG248 Disassembly: crwdns2935265:05crwdnd2935265:01crwdnd2935265:02crwdne2935265:0 ASUS VG248 Disassembly: crwdns2935265:05crwdnd2935265:02crwdnd2935265:02crwdne2935265:0
    • Repeat the procedure around the display, lifting up the center of the next side.

  6. ASUS VG248 Disassembly: crwdns2935265:06crwdnd2935265:01crwdnd2935265:02crwdne2935265:0 ASUS VG248 Disassembly: crwdns2935265:06crwdnd2935265:02crwdnd2935265:02crwdne2935265:0
    • Move around to the other long side and lift up on the center of the bezel.

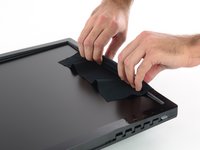
  7. ASUS VG248 Disassembly: crwdns2935265:07crwdnd2935265:01crwdnd2935265:02crwdne2935265:0 ASUS VG248 Disassembly: crwdns2935265:07crwdnd2935265:02crwdnd2935265:02crwdne2935265:0
    • Grip the center of the final side and lift the bezel away from the rear case.

  8. ASUS VG248 Disassembly: crwdns2935265:08crwdnd2935265:01crwdnd2935265:02crwdne2935265:0 ASUS VG248 Disassembly: crwdns2935265:08crwdnd2935265:02crwdnd2935265:02crwdne2935265:0
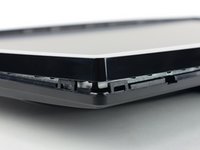
    • Now that you've freed the centers of the four sides, it's time to move on to the corners.

    • Each corner is secured by two large clips that can't be freed by just pulling straight up like you did with the sides.

    • In the next step, you'll be pushing in on the corner clip on the left of the bottom edge of the bezel.

  9. ASUS VG248 Disassembly: crwdns2935265:09crwdnd2935265:01crwdnd2935265:02crwdne2935265:0 ASUS VG248 Disassembly: crwdns2935265:09crwdnd2935265:02crwdnd2935265:02crwdne2935265:0
    crwdns2935267:0crwdne2935267:0
    Jimmy
    $7.95
    crwdns2942207:0crwdne2942207:0
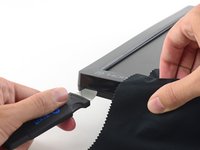
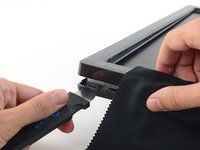
    • Using a thin stiff prying device, like a Jimmy, press in against the bottom clip in the lower left corner (beneath the HDMI logo).

    • While pressing the clip in, pull up on the lower edge of the bezel. The entire corner should pop free.

  10. ASUS VG248 Disassembly: crwdns2935265:010crwdnd2935265:01crwdnd2935265:03crwdne2935265:0 ASUS VG248 Disassembly: crwdns2935265:010crwdnd2935265:02crwdnd2935265:03crwdne2935265:0 ASUS VG248 Disassembly: crwdns2935265:010crwdnd2935265:03crwdnd2935265:03crwdne2935265:0
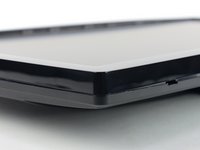
    • Once you've freed one corner, you should be able to gently twist the bezel off, freeing all of the remaining corners.

    • If any corners are particularly stubborn, repeat the previous step on the difficult corner.

  11. ASUS VG248 Disassembly: crwdns2935265:011crwdnd2935265:01crwdnd2935265:01crwdne2935265:0
    • Remove the bezel.

  12. ASUS VG248 Disassembly: crwdns2935265:012crwdnd2935265:01crwdnd2935265:02crwdne2935265:0 ASUS VG248 Disassembly: crwdns2935265:012crwdnd2935265:02crwdnd2935265:02crwdne2935265:0
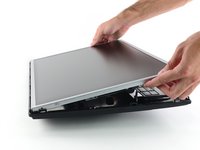
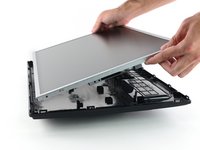
    • Lift the LCD out of the rear case.

    • The row of adjustment buttons will come out of the case with the display, attached by a thin ribbon cable. Take care not to damage the cable.

  13. ASUS VG248 Disassembly: crwdns2935265:013crwdnd2935265:01crwdnd2935265:01crwdne2935265:0
    • With the casing removed, you now have access to the button board, cables, and the housing over the motherboard components.

crwdns2915888:0crwdne2915888:0

To reassemble your device, follow these instructions in reverse order.

crwdns2935229:019crwdne2935229:0

Sam Goldheart

crwdns2935283:010/18/12crwdne2935283:0

465.744 crwdns2915208:0crwdne2915208:0

crwdns2935297:0538crwdne2935297:0

crwdns2915084:0crwdne2915084:0

iFixit crwdns2935289:0iFixitcrwdne2935289:0

Staff

crwdns2931471:0135crwdne2931471:0

crwdns2935297:016.816crwdne2935297:0

crwdns2944067:08crwdne2944067:0

Do you know of any place that sell the replacement lcd screen?

treymcbrd - crwdns2934203:0crwdne2934203:0
Hi there, I have a little thunderbug trapped in the LCD is it possible to take the metal casing at the front of to reomve said bug? Thanks

TJ Grainger - crwdns2934203:0crwdne2934203:0
You could yes, but be very careful NOT to introduce dust into the panel!

Bertus van den Dikkenberg -

Hi. A really small bug got stuck within my screen and I accidentally squished it so now it’s dead in there and I want to clean it. How would I remove the top layer of the screen? Because from what I can see it seems like it got squished between the glass and the actual LCD screen itself.

Carl Viernes - crwdns2934203:0crwdne2934203:0

crwdns2917038:0crwdne2917038:0

crwdns2936625:0crwdne2936625:0:

crwdns2936751:024crwdne2936751:0 29

crwdns2936753:07crwdne2936753:0 239

crwdns2936753:030crwdne2936753:0 971

crwdns2942667:0crwdne2942667:0 114,845