crwdns2933423:0crwdne2933423:0

ASUS U57A-BBL4 Display Assembly Replacement

crwdns2942213:0crwdne2942213:0

  1. ASUS U57A-BBL4 Display Assembly Replacement, Display Assembly: crwdns2935265:01crwdnd2935265:01crwdnd2935265:02crwdne2935265:0 ASUS U57A-BBL4 Display Assembly Replacement, Display Assembly: crwdns2935265:01crwdnd2935265:02crwdnd2935265:02crwdne2935265:0
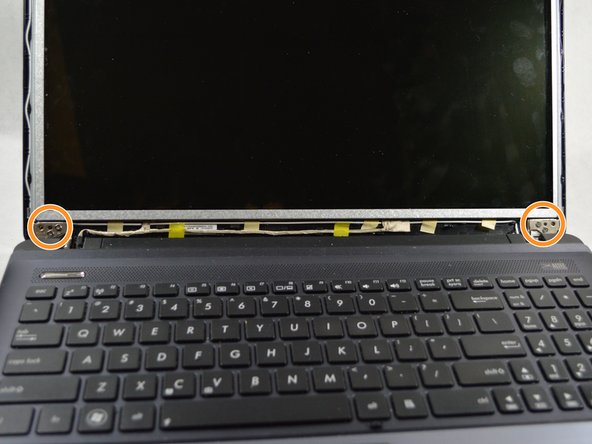
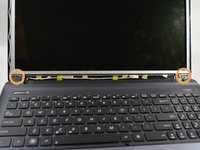
    • Carefully pry the two rubber covers at the bottom of the screen off with a metal sprudger.

  2. ASUS U57A-BBL4 Display Assembly Replacement: crwdns2935265:02crwdnd2935265:01crwdnd2935265:01crwdne2935265:0
    • Remove the two 1.84 mm Phillips head screws at the bottom of the screen using PH00 screw driver.

  3. ASUS U57A-BBL4 Display Assembly Replacement: crwdns2935265:03crwdnd2935265:01crwdnd2935265:01crwdne2935265:0
    • Starting from one of the corners, use your fingers to pry the bezel from the screen.

    • There is a popping sound when the bezel is loosened from the screen.

  4. ASUS U57A-BBL4 Display Assembly Replacement: crwdns2935265:04crwdnd2935265:01crwdnd2935265:03crwdne2935265:0 ASUS U57A-BBL4 Display Assembly Replacement: crwdns2935265:04crwdnd2935265:02crwdnd2935265:03crwdne2935265:0 ASUS U57A-BBL4 Display Assembly Replacement: crwdns2935265:04crwdnd2935265:03crwdnd2935265:03crwdne2935265:0
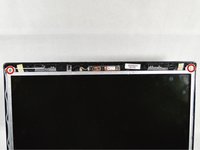
    • Remove the top two 2 mm Phillips head screws.

    • Remove the four 2 mm Phillips head screws on the bottom.

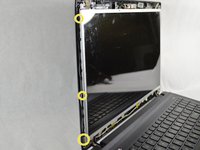
    • Remove the eight 2 mm Phillips head screws on the sides of the screen. There are four on each side.

    • There are 14 screws in total: two on the top, four on the bottom, and four on each side. Use PH00 screw-driver for removing all 14 screws.

  5. ASUS U57A-BBL4 Display Assembly Replacement: crwdns2935265:05crwdnd2935265:01crwdnd2935265:02crwdne2935265:0 ASUS U57A-BBL4 Display Assembly Replacement: crwdns2935265:05crwdnd2935265:02crwdnd2935265:02crwdne2935265:0
    • Don't tear off the bottom of the screen or you might damage the connector cable.

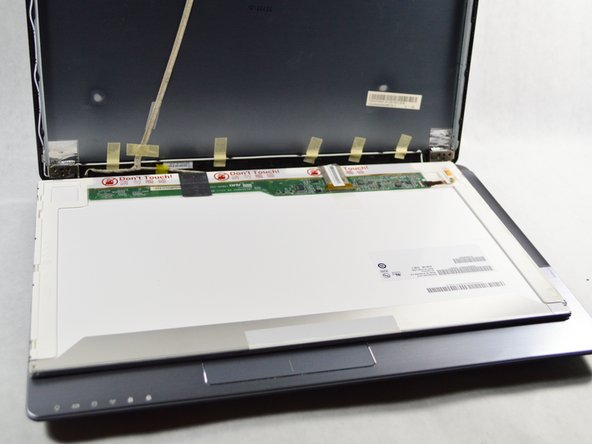
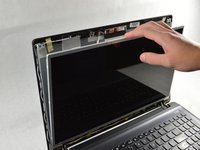
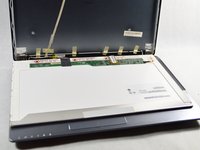
    • Carefully lower the screen from the casing with your fingers, making sure to keep the bottom intact and lay it face down on the keyboard.

  6. ASUS U57A-BBL4 Display Assembly Replacement: crwdns2935265:06crwdnd2935265:01crwdnd2935265:02crwdne2935265:0 ASUS U57A-BBL4 Display Assembly Replacement: crwdns2935265:06crwdnd2935265:02crwdnd2935265:02crwdne2935265:0
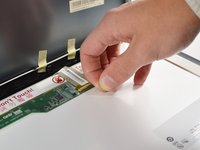
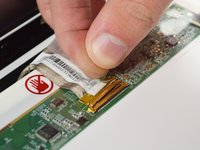
    • Disconnect the connector cable at the bottom by loosening the adhesive tape and lifting up.

    • Gently slide the cable out of the ridges to free the screen from the casing.

crwdns2915888:0crwdne2915888:0

To reassemble your device, follow these instructions in reverse order.

crwdns2935227:0crwdne2935227:0

Isabella Bernardi

crwdns2935283:010/18/17crwdne2935283:0

671 crwdns2915208:0crwdne2915208:0

crwdns2935297:06crwdne2935297:0

crwdns2915084:0crwdne2915084:0

UMass Dartmouth, Team S2-G4, Julie Fall 2017 crwdns2935289:0UMass Dartmouth, Team S2-G4, Julie Fall 2017crwdne2935289:0

UMASSD-JULIE-F17S2G4

crwdns2931471:03crwdne2931471:0

crwdns2935297:06crwdne2935297:0

crwdns2944067:00crwdne2944067:0

crwdns2917038:0crwdne2917038:0

crwdns2936625:0crwdne2936625:0:

crwdns2936751:024crwdne2936751:0 1

crwdns2936753:07crwdne2936753:0 4

crwdns2936753:030crwdne2936753:0 9

crwdns2942667:0crwdne2942667:0 258