crwdns2933423:0crwdne2933423:0

ASUS U52F-BBG6 Back Cover Replacement

crwdns2862623:0crwdne2862623:0
crwdns2942641:0crwdne2942641:0

crwdns2942213:0crwdne2942213:0

  1. ASUS U52F-BBG6 Back Cover Replacement, Back Cover: crwdns2935265:01crwdnd2935265:01crwdnd2935265:02crwdne2935265:0 ASUS U52F-BBG6 Back Cover Replacement, Back Cover: crwdns2935265:01crwdnd2935265:02crwdnd2935265:02crwdne2935265:0
    • Flip the laptop over to the back.

    • Slide the right latch to unlock, then simultaneously slide the left latch outward while pulling the battery out.

  2. ASUS U52F-BBG6 Back Cover Replacement: crwdns2935265:02crwdnd2935265:01crwdnd2935265:03crwdne2935265:0 ASUS U52F-BBG6 Back Cover Replacement: crwdns2935265:02crwdnd2935265:02crwdnd2935265:03crwdne2935265:0 ASUS U52F-BBG6 Back Cover Replacement: crwdns2935265:02crwdnd2935265:03crwdnd2935265:03crwdne2935265:0
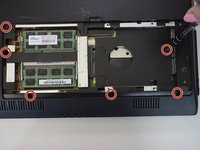
    • Unscrew all twelve 3mm Phillips screws with the J1 screwdriver.

    • Unscrew two 3mm Phillips screws on the black panel using the PH0 screwdriver.

    • Lift the black panel upward by inserting your fingernail in the space provided.

  3. ASUS U52F-BBG6 Back Cover Replacement: crwdns2935265:03crwdnd2935265:01crwdnd2935265:03crwdne2935265:0 ASUS U52F-BBG6 Back Cover Replacement: crwdns2935265:03crwdnd2935265:02crwdnd2935265:03crwdne2935265:0 ASUS U52F-BBG6 Back Cover Replacement: crwdns2935265:03crwdnd2935265:03crwdnd2935265:03crwdne2935265:0
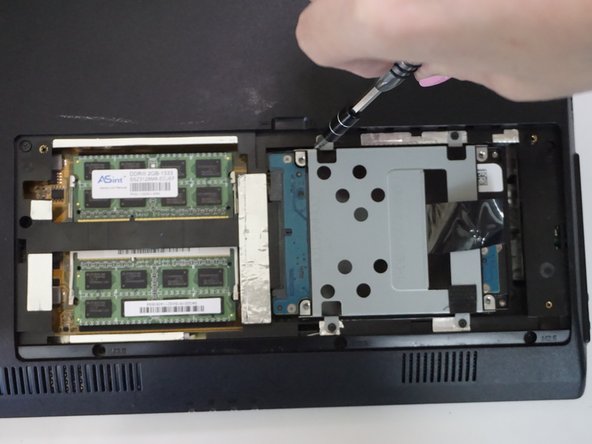
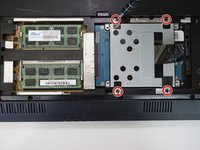
    • In the RAM and hard drive compartment, unscrew the four 3mm Phillips screws using the J1 screwdriver.

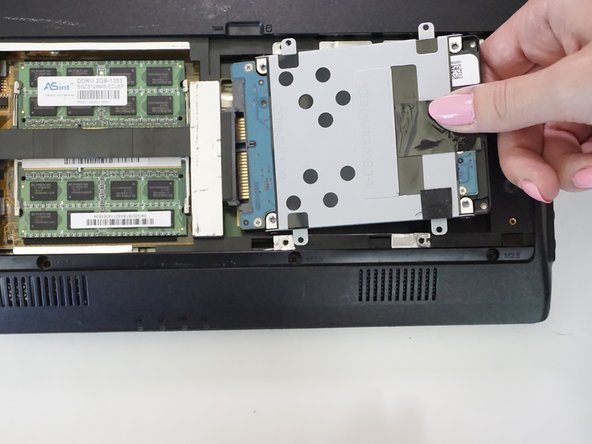
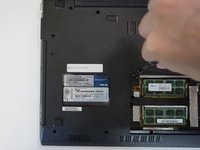
    • Gently pull out the hard drive.

  4. ASUS U52F-BBG6 Back Cover Replacement: crwdns2935265:04crwdnd2935265:01crwdnd2935265:02crwdne2935265:0 ASUS U52F-BBG6 Back Cover Replacement: crwdns2935265:04crwdnd2935265:02crwdnd2935265:02crwdne2935265:0
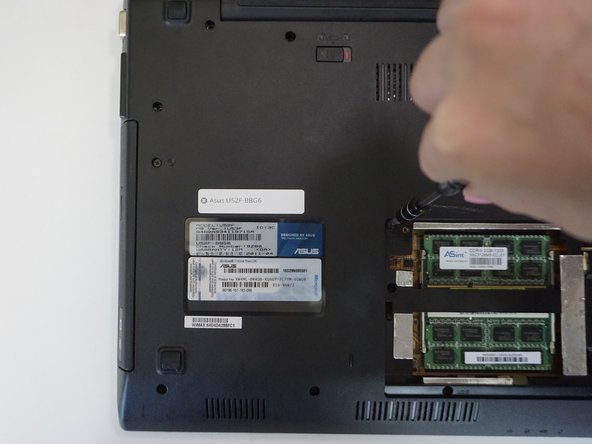
    • Unscrew six 3mm Phillips screws in the RAM and hard drive compartment with the J1 screwdriver.

  5. ASUS U52F-BBG6 Back Cover Replacement: crwdns2935265:05crwdnd2935265:01crwdnd2935265:01crwdne2935265:0
    • Pull the CD drive outward with your left hand.

  6. ASUS U52F-BBG6 Back Cover Replacement: crwdns2935265:06crwdnd2935265:01crwdnd2935265:02crwdne2935265:0 ASUS U52F-BBG6 Back Cover Replacement: crwdns2935265:06crwdnd2935265:02crwdnd2935265:02crwdne2935265:0
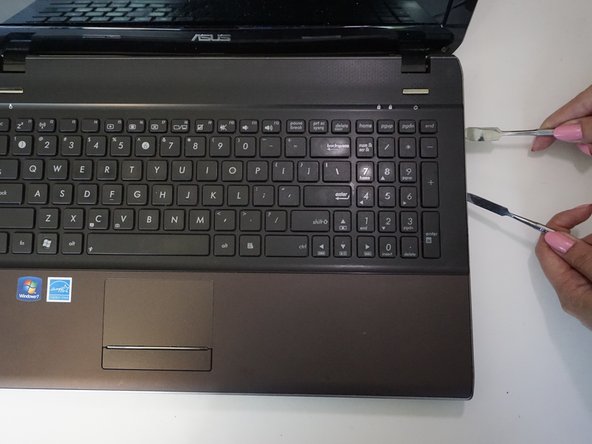
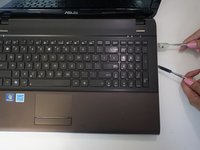
    • Insert and gently twist the flat metal spudger between the keyboard assembly and the bottom plastic cover so that a small seam is opened.

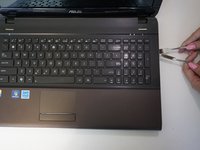
    • Put in the metal spudger in the seam to hold its place while twisting and levering the flat metal spudger along the whole keyboard.

    • Be careful not to hit any of the internals with the metal spudger. The regular black nylon spudger should be used whenever possible, especially around batteries or sensitive internal components.

    • You will need add a lot of pressure to open the laptop. Expect to hear snaps as the clips holding the two pieces are released.

    • Slowly pry off the back

crwdns2915888:0crwdne2915888:0

To reassemble your device, follow these instructions in reverse order.

Ashley DeHuff

crwdns2935283:009/15/16crwdne2935283:0

852 crwdns2915208:0crwdne2915208:0

crwdns2935297:08crwdne2935297:0

crwdns2915084:0crwdne2915084:0

CSU Fullerton, Team 1-3, Bruce Fall 2016 crwdns2935289:0CSU Fullerton, Team 1-3, Bruce Fall 2016crwdne2935289:0

CSUF-BRUCE-F16S1G3

crwdns2931471:04crwdne2931471:0

crwdns2935297:09crwdne2935297:0

crwdns2947412:00crwdne2947412:0

crwdns2917038:0crwdne2917038:0

crwdns2936625:0crwdne2936625:0:

crwdns2936751:024crwdne2936751:0 0

crwdns2936753:07crwdne2936753:0 0

crwdns2936753:030crwdne2936753:0 0

crwdns2942667:0crwdne2942667:0 99