crwdns2915892:0crwdne2915892:0
If your ASUS Q400A-BHI7N03 laptop has been struggling to keep up with your demands, experiencing sluggish performance and lag when running applications,use this guide to replace its RAM (Random Access Memory). The RAM plays a critical role in your laptop's performance. An insufficient or faulty RAM module can lead to slow operation, unresponsive programs, and decreased productivity. In this guide, we will take you through a step-by-step process to replace the RAM in your ASUS Q400A-BHI7N03 laptop, Before we start the process, inspect your laptop for any potential issues and make sure to turn it off completely and disconnect it from any external power sources.
crwdns2942213:0crwdne2942213:0
-
-
Turn off the laptop.
-
Disconnect the charging cable from the laptop.
-
Flip the laptop over so that it is upside down.
-
Orient the laptop so that the battery is away from you.
-
-
-
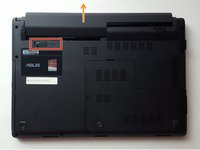
In the top right corner, push the tab to the right to the unlocked position.
-
-
-
Find the tab in the top left corner. With one finger, pull the tab to the left to the unlocked position.
-
While holding this tab in the unlocked position, gently pull the battery away from you.
-
-
-
-
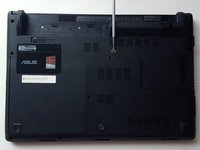
Flip the laptop so that it is upside down and locate a screw near the middle of the laptop. Remove the 8 mm PH0 screw.
-
-
-
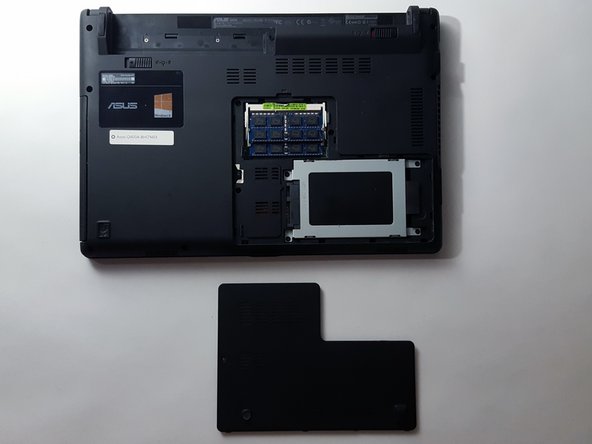
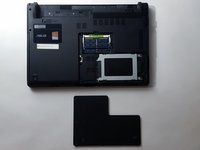
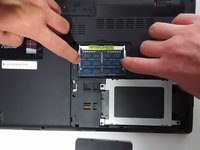
Use a spudger or opening tool to remove the L shaped section of the back cover.
-
-
-
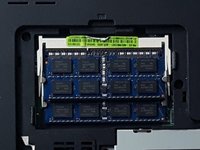
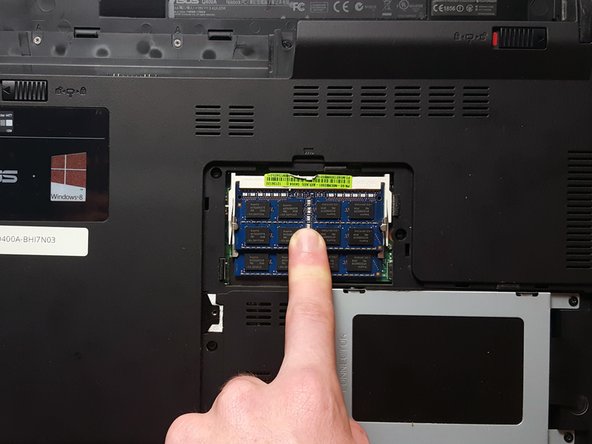
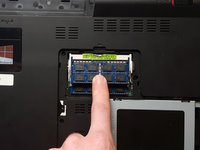
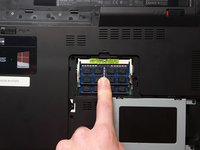
Identify the two metal tabs on both sides of the RAM.
-
Gently push both tabs outwards at the same time. The RAM will pop up.
-
Carefully pull the RAM out.
-
-
-
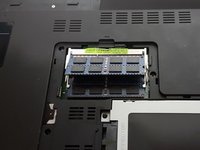
To put RAM back in, lineup the RAM with the plastic holder.
-
Slide it into the slot at a 30 degree angle and push down until it clicks into place.
-


To reassemble your device, follow these instructions in reverse order.
crwdns2935287:0crwdne2935287:0

UC Davis, Team 1-4, Rodger Winter 2017 crwdns2935289:0UC Davis, Team 1-4, Rodger Winter 2017crwdne2935289:0
UCD-RODGER-W17S1G4
crwdns2931471:05crwdne2931471:0
crwdns2935297:04crwdne2935297:0
crwdns2947412:02crwdne2947412:0
Hello there ! I got a question. What type of ram should I buy to replace my Asus ? I trying to upgrade to 16 gb
If I only have 1 stick of 4gb, and assuming I won't be getting more, does it matter which slot I place it? Top or bottom (closer to the motherboard) ? Thanks ahead of time!