crwdns2933423:0crwdne2933423:0

ASUS Q400A-BHI7N03 Optical Drive Replacement

crwdns2942213:0crwdne2942213:0

  1. ASUS Q400A-BHI7N03 Optical Drive Replacement, Battery: crwdns2935265:01crwdnd2935265:01crwdnd2935265:01crwdne2935265:0
    • Turn off the laptop.

    • Disconnect the charging cable from the laptop.

    • Failure to unplug the cable could result in electric shock.

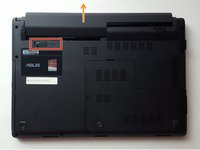
    • Flip the laptop over so that it is upside down.

    • The slightly raised area is the battery.

    • Orient the laptop so that the battery is away from you.

  2. ASUS Q400A-BHI7N03 Optical Drive Replacement: crwdns2935265:02crwdnd2935265:01crwdnd2935265:01crwdne2935265:0
    • In the top right corner, push the tab to the right to the unlocked position.

  3. ASUS Q400A-BHI7N03 Optical Drive Replacement: crwdns2935265:03crwdnd2935265:01crwdnd2935265:02crwdne2935265:0 ASUS Q400A-BHI7N03 Optical Drive Replacement: crwdns2935265:03crwdnd2935265:02crwdnd2935265:02crwdne2935265:0
    • Find the tab in the top left corner. With one finger, pull the tab to the left to the unlocked position.

    • While holding this tab in the unlocked position, gently pull the battery away from you.

  4. ASUS Q400A-BHI7N03 Optical Drive Replacement, Optical Drive: crwdns2935265:04crwdnd2935265:01crwdnd2935265:01crwdne2935265:0
    • Locate and remove the 8mm PH0 screw near the middle of the laptop.

  5. ASUS Q400A-BHI7N03 Optical Drive Replacement: crwdns2935265:05crwdnd2935265:01crwdnd2935265:02crwdne2935265:0 ASUS Q400A-BHI7N03 Optical Drive Replacement: crwdns2935265:05crwdnd2935265:02crwdnd2935265:02crwdne2935265:0
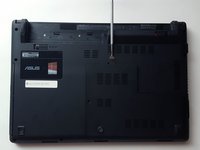
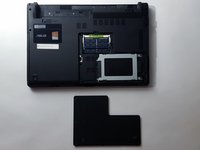
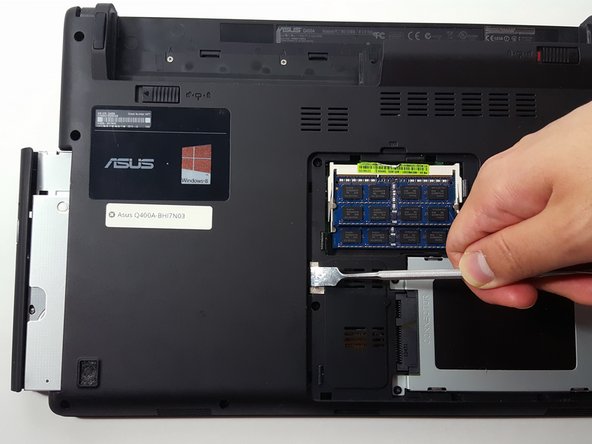
    • Use a metal opening tool to remove the L-shaped, plastic cover.

    • To avoid breaking the plastic, alternate the sides where you pry.

  6. ASUS Q400A-BHI7N03 Optical Drive Replacement: crwdns2935265:06crwdnd2935265:01crwdnd2935265:02crwdne2935265:0 ASUS Q400A-BHI7N03 Optical Drive Replacement: crwdns2935265:06crwdnd2935265:02crwdnd2935265:02crwdne2935265:0
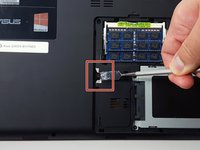
    • On the left side of the section, there is a metal tab. Using a metal opening tool, push the tab as far as possible to the left.

    • Only push on the metal tab so you do not damage the surrounding plastic.

    • Once the optical drive is sticking out of the left side of the laptop, slide it smoothly out of its slot.

crwdns2915888:0crwdne2915888:0

To reassemble your device, follow these instructions in reverse order.

Matthew Gold

crwdns2935283:001/19/17crwdne2935283:0

401 crwdns2915208:0crwdne2915208:0

crwdns2935297:04crwdne2935297:0

crwdns2915084:0crwdne2915084:0

UC Davis, Team 1-4, Rodger Winter 2017 crwdns2935289:0UC Davis, Team 1-4, Rodger Winter 2017crwdne2935289:0

UCD-RODGER-W17S1G4

crwdns2931471:05crwdne2931471:0

crwdns2935297:04crwdne2935297:0

crwdns2944067:00crwdne2944067:0

crwdns2917038:0crwdne2917038:0

crwdns2936625:0crwdne2936625:0:

crwdns2936751:024crwdne2936751:0 1

crwdns2936753:07crwdne2936753:0 1

crwdns2936753:030crwdne2936753:0 9

crwdns2942667:0crwdne2942667:0 499