crwdns2933423:0crwdne2933423:0

ASUS EEE PC701SD-WHI004X Keyboard Replacement

crwdns2942213:0crwdne2942213:0

  1. ASUS EEE PC701SD-WHI004X Keyboard Replacement, Battery: crwdns2935265:01crwdnd2935265:01crwdnd2935265:02crwdne2935265:0 ASUS EEE PC701SD-WHI004X Keyboard Replacement, Battery: crwdns2935265:01crwdnd2935265:02crwdnd2935265:02crwdne2935265:0
    • Flip the laptop over, you should see two battery tabs.

    • Slide the right tab towards the right. The orange dot should be visible. This tab will be locked open.

  2. ASUS EEE PC701SD-WHI004X Keyboard Replacement: crwdns2935265:02crwdnd2935265:01crwdnd2935265:02crwdne2935265:0 ASUS EEE PC701SD-WHI004X Keyboard Replacement: crwdns2935265:02crwdnd2935265:02crwdnd2935265:02crwdne2935265:0
    • While holding the left tab towards the left. Gently slide the battery out of the laptop.

  3. ASUS EEE PC701SD-WHI004X Keyboard Replacement, Keyboard: crwdns2935265:03crwdnd2935265:01crwdnd2935265:03crwdne2935265:0 ASUS EEE PC701SD-WHI004X Keyboard Replacement, Keyboard: crwdns2935265:03crwdnd2935265:02crwdnd2935265:03crwdne2935265:0 ASUS EEE PC701SD-WHI004X Keyboard Replacement, Keyboard: crwdns2935265:03crwdnd2935265:03crwdnd2935265:03crwdne2935265:0
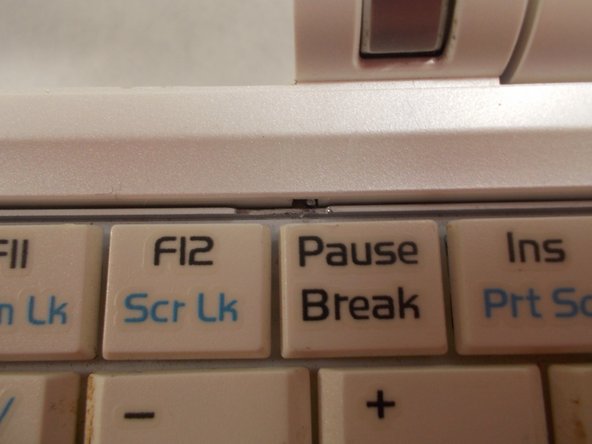
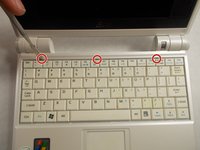
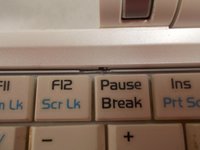
    • Push the 3 tabs at the top of the keyboard in and down one at a time using a nylon spudger.

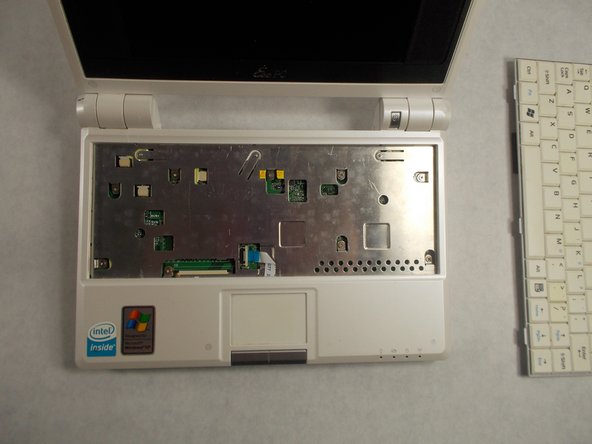
    • Once the three tabs have been pushed in, gently pry the top of the keyboard until it begins to hinge out of its slot.

    • The keyboard is still attached by a cable. Be careful when removing not to damage the cable. Do not yank the keyboard out.

  4. ASUS EEE PC701SD-WHI004X Keyboard Replacement: crwdns2935265:04crwdnd2935265:01crwdnd2935265:03crwdne2935265:0 ASUS EEE PC701SD-WHI004X Keyboard Replacement: crwdns2935265:04crwdnd2935265:02crwdnd2935265:03crwdne2935265:0 ASUS EEE PC701SD-WHI004X Keyboard Replacement: crwdns2935265:04crwdnd2935265:03crwdnd2935265:03crwdne2935265:0
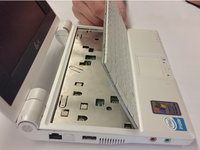
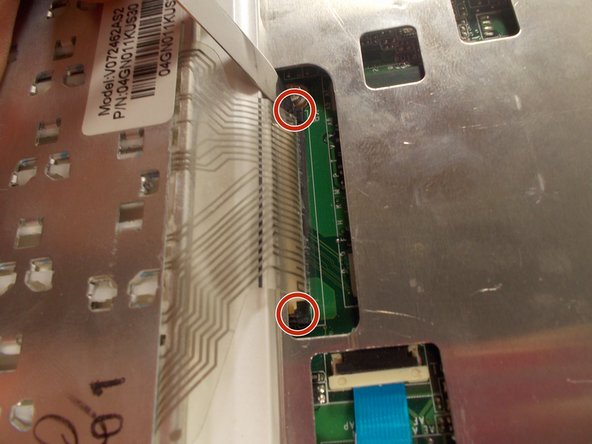
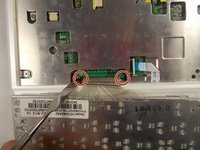
    • Push the two sides of the ribbon cable connector away from yourself. This will unseat the ribbon cable.

    • Once the tabs are unseated, you can gently remove the ribbon cable by pulling it out of its slot. The keyboard can now be removed.

    • To be on the safe side, it’s better to use a nylon spudger, rather than the metal spudger shown in the picture.

crwdns2915888:0crwdne2915888:0

To reassemble your device, follow these instructions in reverse order.

crwdns2935227:0crwdne2935227:0

mir

crwdns2935283:003/24/17crwdne2935283:0

409 crwdns2915208:0crwdne2915208:0

crwdns2935297:03crwdne2935297:0

crwdns2915084:0crwdne2915084:0

UMass Dartmouth, Team S2-G8, Isaacson Spring 2017 crwdns2935289:0UMass Dartmouth, Team S2-G8, Isaacson Spring 2017crwdne2935289:0

UMASSD-ISAACSON-S17S2G8

crwdns2931471:03crwdne2931471:0

crwdns2935297:010crwdne2935297:0

crwdns2944067:00crwdne2944067:0

crwdns2917038:0crwdne2917038:0

crwdns2936625:0crwdne2936625:0:

crwdns2936751:024crwdne2936751:0 1

crwdns2936753:07crwdne2936753:0 5

crwdns2936753:030crwdne2936753:0 9

crwdns2942667:0crwdne2942667:0 516