crwdns2915892:0crwdne2915892:0
Has your laptop given you the Blue Screen of Death? Are you ready to upgrade your memory? Use this guide to replace the memory in your laptop.
crwdns2942213:0crwdne2942213:0
-
-
Use a Philips #1 screwdriver to remove the nine screws from the back cover.
-
-
-
Turn the laptop over and open the display.
-
Insert the flat edge of the spudger into the crease of the keyboard cover.
-
While the spudger is in the crease, carefully pry open the casing by sliding the spudger along the edge.
-
-
-
Slowly lift the cover open from the front of the laptop, but do not completely remove it.
-
Note the locations of the three white and blue data cables connecting to the keyboard to the computer's main board.
-
-
-
Disconnect the three data cables from the motherboard.
-
-
-
Remove the fully disconnected keyboard module from the laptop.
-
-
-
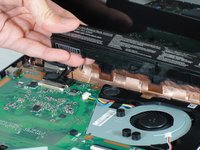
Remove the two screws securing the battery to the laptop case with a Phillips #1 screwdriver.
-
-
-
-
Lift the battery out and remove it:
-
Use your fingertips to evenly grip the battery on the left and right sides of the battery.
-
Pull straight up to lift the battery out of its place.
-
-
-
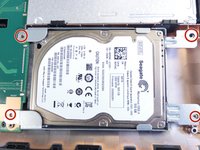
Remove the four screws that hold the hard drive in place with the Philips #1 screwdriver.
-
-
-
Remove the hard drive by sliding it to the right to disconnect it from the motherboard and lifting out.
-
-
-
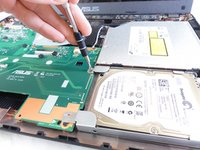
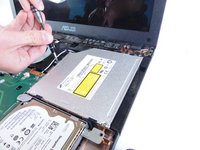
Remove the single screw that is holding the drive in place using the Phillips #1 Screwdriver.
-
-
-
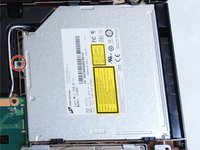
Slide the drive out to the right of the laptop to disconnect from the motherboard.
-
-
crwdns2935267:0crwdne2935267:0Tweezers$4.99
-
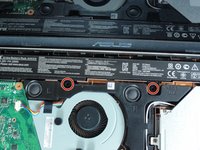
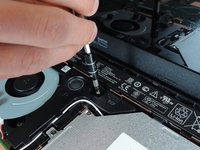
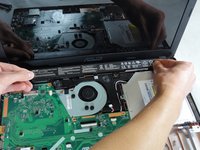
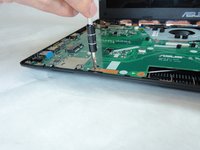
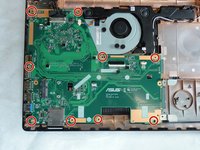
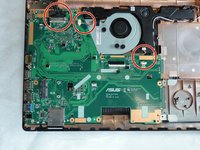
Remove the 9 screws from the motherboard using the Philips #1 screwdriver.
-
-
-
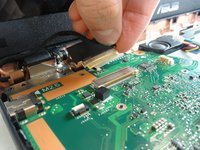
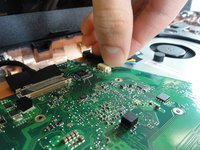
Disconnect the three cables attached to the motherboard.
-
The large, black cable is connected to the screen. Carefully wiggle the cable out by gripping the black tape with your fingers.
-
The cable for the fan and speaker use similar connectors. Use the black spudger or carefully grip the sides of each connector with your fingers to slowly pull them out.
-
-
-
Pull the motherboard to the right to clear the peripheral connections of the laptop casing.
-
Lift the motherboard out of the laptop.
-
-
-
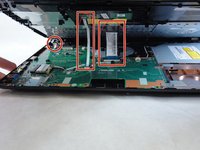
Gently push the two metal clips outwards that hold the RAM in place.
-
-
-
Lift the RAM module out of its place.
-


To reassemble your device, follow these instructions in reverse order.
To reassemble your device, follow these instructions in reverse order.
crwdns2935221:0crwdne2935221:0
crwdns2935227:0crwdne2935227:0