crwdns2915892:0crwdne2915892:0
If your DVD drive is not playing your favorite movies, it may be time to replace it. This guide will walk you through how to remove your DVD drive.
crwdns2942213:0crwdne2942213:0
-
-
Use a Philips #1 screwdriver to remove the nine screws from the back cover.
-
-
-
Turn the laptop over and open the display.
-
Insert the flat edge of the spudger into the crease of the keyboard cover.
-
While the spudger is in the crease, carefully pry open the casing by sliding the spudger along the edge.
-
-
-
Slowly lift the cover open from the front of the laptop, but do not completely remove it.
-
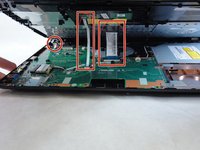
Note the locations of the three white and blue data cables connecting to the keyboard to the computer's main board.
-
-
-
-
Disconnect the three data cables from the motherboard.
-
-
-
Remove the fully disconnected keyboard module from the laptop.
-
-
-
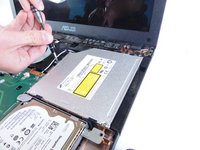
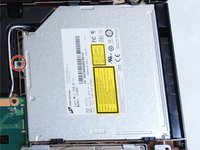
Remove the single screw that is holding the drive in place using the Phillips #1 Screwdriver.
-
-
-
Slide the drive out to the right of the laptop to disconnect from the motherboard.
-


To reassemble your device, follow these instructions in reverse order.
To reassemble your device, follow these instructions in reverse order.
crwdns2915084:0crwdne2915084:0

IUPUI, Team 1-2, Baechle Fall 2015 crwdns2935289:0IUPUI, Team 1-2, Baechle Fall 2015crwdne2935289:0
IUPUI-BAECHLE-F15S1G2
crwdns2931471:03crwdne2931471:0
crwdns2935297:08crwdne2935297:0