crwdns2915892:0crwdne2915892:0
Not only is it illegal to operate your vehicle with broken taillights, it is also unsafe. We understand that getting started on your vehicle can be quite intimidating, but with our guide, there will be no need to go to the mechanic. Changing your tail lights are easier than you think! The following steps show how to replace the tail light of your 2017 Honda Civic.
Before beginning this guide, be sure that your car is off and in park. It is also important to use gloves to avoid getting oils from your hands on the bulb which will damage the bulb and cause it to wear out faster or break.
crwdns2942213:0crwdne2942213:0
-
-
Unlock and open the trunk of the car.
-
-
-
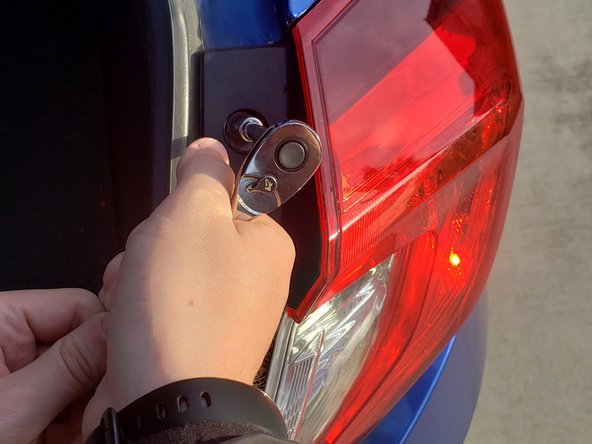
On the exterior of the trunk, take notice of the bolts connected to the tail lights. You will have to work with these.
-
-
-
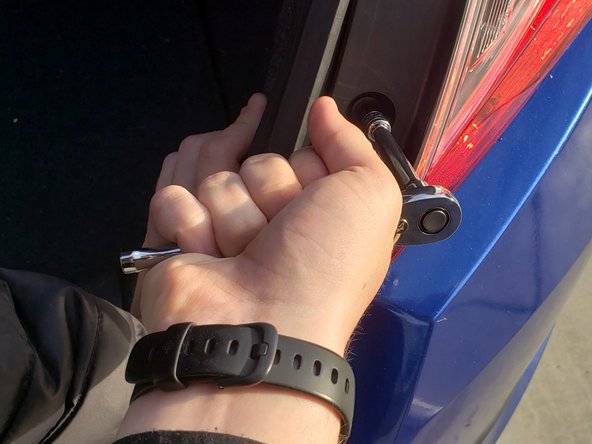
Attach the #8 socket to the ratchet and loosen each of the bolts, twisting the ratchet in a counterclockwise direction.
-
Use your hand to secure the tail light so it doesn't fall off once the bolts are loose.
-
-
-
-
Pull the tail light out from the rear bumper.
-
-
-
Once the tail light is removed, twist the light bulb connector counterclockwise to loosen and then pull it out of the socket.
-
-
-
Use the #8 socket to replace the bolts that secure the tail light.
-
-
-
Lightly tighten each bolt in the clockwise direction, alternating between each one in order to avoid one misalignment.
-


To reassemble your device, follow these instructions in reverse order.
To reassemble your device, follow these instructions in reverse order.
crwdns2935221:0crwdne2935221:0
crwdns2935229:02crwdne2935229:0

crwdns2915084:0crwdne2915084:0

UCD-MORRIS-S23S1G5 crwdns2935289:0UCD-MORRIS-S23S1G5crwdne2935289:0
Community
crwdns2931471:02crwdne2931471:0
crwdns2935303:01crwdne2935303:0