crwdns2915892:0crwdne2915892:0
Change the oil in your 2006-2011 Honda Civic to keep it running strong and improve engine longevity. This guide will cover all models equipped with the 1.8L engine.
Honda recommends an oil change when the maintenance light comes on, or after one year, whichever comes first. In tough driving conditions with a lot of stop-and-go traffic, the maintenance light will come on after about 6,000 miles, indicating 15% oil life remaining.
crwdns2942213:0crwdne2942213:0
-
-
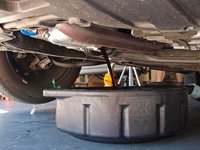
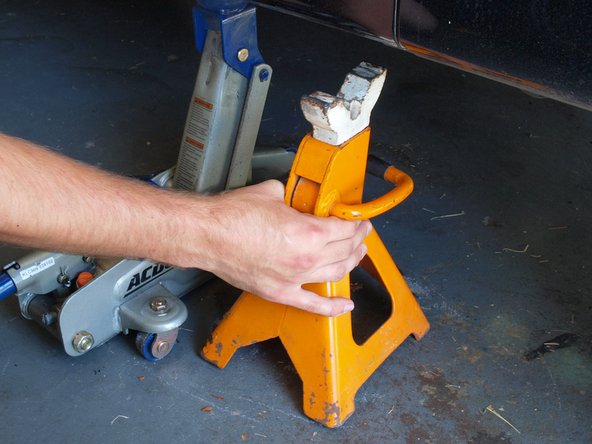
Place a jack at the jacking point at the front passenger side on the pinch weld, the thicker metal part just behind the front wheel.
-
Use the jack to lift the passenger side of the car until you have enough room to work under the car comfortably.
-
-
-
Place a jack stand immediately behind the jack on the pinch weld.
-
Slowly lower the car onto the jack stand and remove the jack.
-
-
-
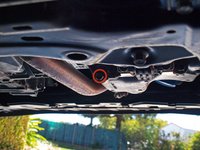
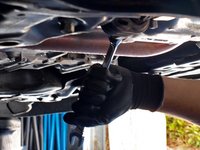
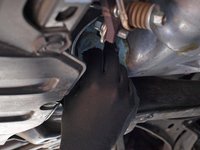
Locate the 17 mm hex oil drain plug at the back of the oil pan, facing the rear of the car.
-
Position an oil drain pan under the oil pan so that it will collect the draining oil.
-
-
-
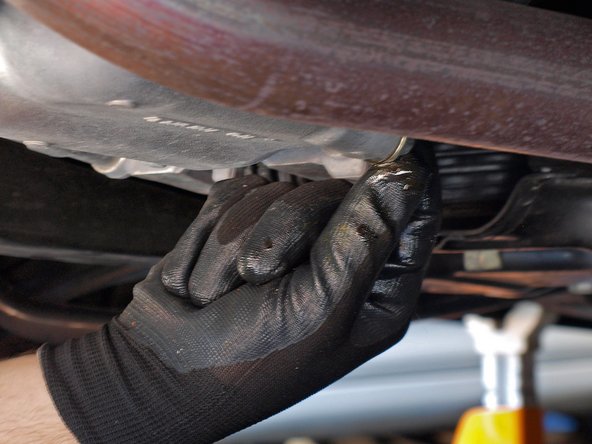
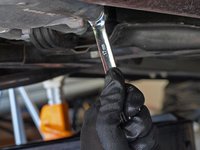
Use a 17 mm box end wrench to loosen the drain plug 3/4 of a turn.
-
Loosen the drain plug by hand until it comes free and oil begins to drain out of the oil pan.
-
-
-
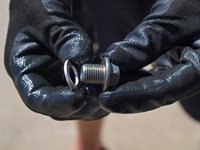
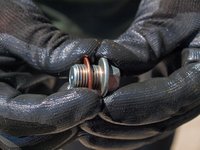
While the old oil is draining, wipe off the drain plug with a clean rag or towel and remove the old drain plug gasket.
-
Place a new drain plug gasket over the threads, making sure that it is large enough to go all the way to the head of the drain plug.
-
-
-
Once the oil has slowed to a drip, wipe off the area around the drain plug with a clean rag or towel.
-
Reinstall the drain plug and tighten it with a box end wrench until it is snug. Alternatively, you can use a torque wrench to verify that the plug is tightened to spec. The torque spec for the drain plug is 29 ft./lbs. (39 Nm)
-
-
-
-
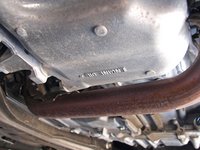
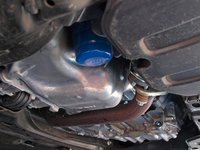
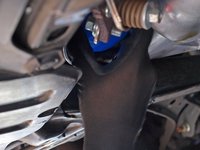
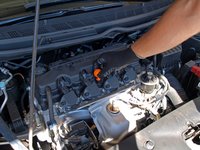
Locate the oil filter at the front, passenger side of the oil pan.
-
Place the oil drain pan underneath the oil filter.
-
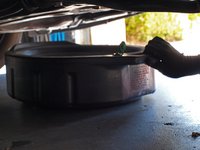
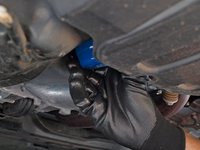
Unscrew and remove the oil filter by turning it counter-clockwise. If the filter is on too tight to remove by hand, use an oil filter wrench to loosen it.
-
-
-
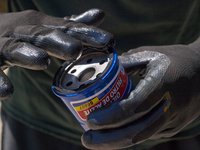
Dip a clean gloved finger into a new bottle of oil and spread a thin layer of oil over the gasket on the new oil filter.
-
Wipe off the oil filter threads and contact area on the engine with a clean rag or towel.
-
Place the new filter over the threads and turn it clockwise by hand until it is snug.
-
-
-
Remove the oil drain pan from underneath the car.
-
Jack the car up enough so that it is no longer resting on the jack stand.
-
Remove the jack stand, then slowly lower the jack until it is no longer supporting the car.
-
-
-
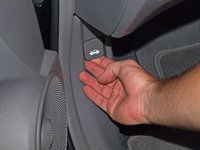
To pop the hood, pull on the hood release lever inside the driver side door.
-
Locate the hood release latch under the hood. Use one hand to press up on the latch while lifting the hood.
-
Prop the hood up by inserting the hood prop rod into the hole labeled with an arrow.
-
-
-
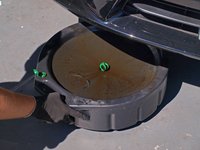
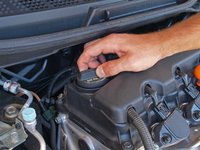
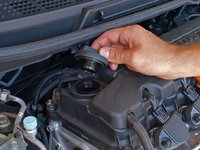
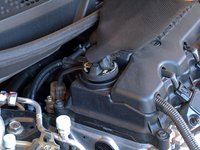
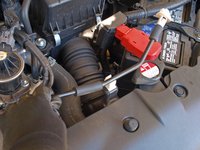
Remove the oil filler cap at the passenger side of the engine by twisting it counter-clockwise then lifting it off of the oil filler hole.
-
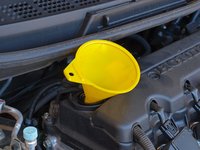
Insert a funnel into the filler hole to prevent spills whilst adding the new oil.
-
-
-
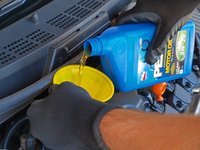
Pour 4 quarts of 5W-20 oil into the funnel.
-
Make sure to use 5W-20 oil. Though using slightly different grades will work, it is best to use the type stated in your owner's manual.
-
Replace the oil filler cap.
-
-
-
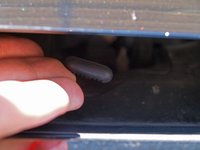
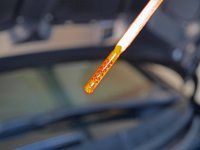
Remove the orange dipstick from under your hood.
-
Wipe the dipstick down with a rag or towel to ensure that you get a true reading.
-
Reinsert the dipstick all the way into its hole, then remove it.
-
The amount of oil on your dipstick determines the oil level. The top of the crosshatched area is the maximum amount of oil you should have, while the bottom of the crosshatching is the minimum.
-
-
-
Lift the hood enough to allow you to lower the hood prop rod back down into its resting location.
-
Gently lower the hood until it clicks into the secondary latch.
-
Press firmly on the edge of the hood until you hear the primary latch engage.
-
-
-
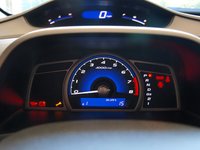
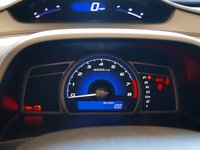
When it's time to change the oil in your Civic, the maintenance light (orange wrench) will appear on your dash, as well as a B1 message, showing an oil life of 15% or less.
-
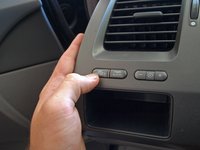
To reset the Oil Life % gauge, press and hold the SEL/RESET button for about 10 seconds until the Oil Life message begins to flash. Release the SEL/RESET button, and hold it again for about 5 seconds until the Oil Life % resets to 100.
-
-
-
Allow 12-24 hours for all of the oil to drain out of the old oil filter.
-
Take your old oil and filter to a recycling facility. Most auto parts stores and repair shops accept these at no charge to you. In addition, some cities and/or counties have a service where they will collect used oil and filters from your home. For more information, see the American Petroleum Institute's web page on used motor oil collection and recycling.
-


crwdns2935221:0crwdne2935221:0
crwdns2935229:0108crwdne2935229:0

crwdns2947412:043crwdne2947412:0
To actually reset the oil light:
1. Hold button for 10 sec
2. Release and rotate button counter clockwise once to select "oil life" (it should be flashing)
3. Press button once (makes whole display flash)
4. Hold button for 5 seconds until it says 100%
To actually reset the 2009 Civic you won’t be rotating the button it’s not like that. It’s exactly like the author states.
’
Greetings from Russia! Thanks for the lesson.
Exactly what you look for in a How-To guide
What kind oil to use u never say ls the same one in the pictures