crwdns2915892:0crwdne2915892:0
If winter's setting in and your 2005 Chrysler Town & Country isn't warming the cabin well, isn't warming the cabin at all, or is leaking coolant, you likely have an issue with your heat flow/variable restrictor valve. This part is plastic and susceptible to damage, especially in older, high-mileage vehicles. This guide clearly will show you how to easily and quickly replace this part.
The valve is under the hood, right next to the firewall, and is responsible for managing the heat flow of coolant to the heating system. This can be a difficult area to maneuver in, so be careful with your hands when replacing the part.
It is very important to make sure your engine is completely cool before replacing your valve as you will be working right next to all of the hottest parts of your vehicle. Additionally, if your vehicle is not cool, some coolant might be lingering inside the heating system, which could result in coolant spilling on you, the ground, and your vehicle.
With that said, this is a relatively simple repair; all you need is the replacement valve, some pliers, and a pair of gloves.
crwdns2942213:0crwdne2942213:0
-
-
Unlatch your hood by pulling the lever underneath the steering wheel.
-
Release the latch under the front of the hood.
-
Open the hood and insert the prop rod into the prop rod groove.
-
-
-
Locate the regulator valve under the windshield wiper assembly, just in front of the firewall.
-
-
-
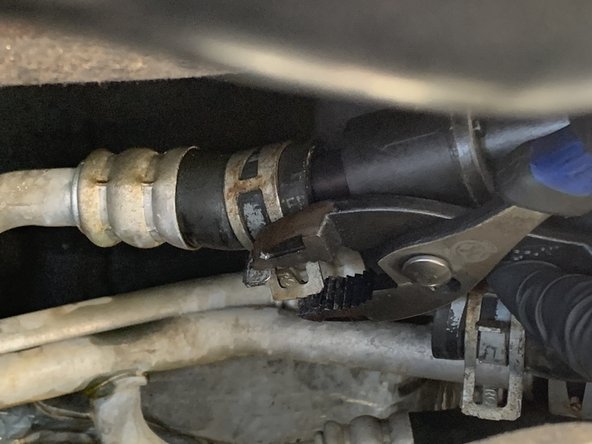
Use pliers to squeeze the clamp tabs on the right side of the valve.
-
While squeezing the clamp tabs, pull the hose to the right to disconnect it from the valve.
-
-
-
-
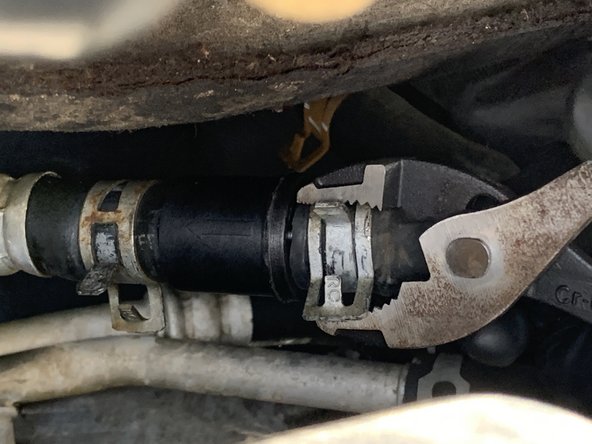
Use pliers to squeeze the clamp tabs on the left side of the valve.
-
While squeezing the left valve clamp tabs, disconnect the left side of the valve from the hose.
-
-
-
With your replacement valve in your free hand, squeeze the clamp tabs on the left hose and insert the replacement valve into the hose.
-
-
-
Ensure the clamp is snugly fit around the hose, and securely clamped down on the valve inside the hose, before you release the clamp tabs.
-
-
-
While squeezing the clamp tabs on the right hose with pliers, insert the hose into the right side of the valve.
-
-
-
Ensure the clamp is snug and squarely fit over the hose, and clamping down on the valve inside the hose, before you release the tabs.
-
-
-
Start your vehicle outdoors and let the engine run until it reaches its normal operating temperature.
-
Ensure there are no leaks around the valve.
-


If there are leaks on the valve, repeat steps 1-9. Make sure the valve is in the correct orientation and the clamps are snug and properly secured. If a problem still occurs, there may be a hose leak in need of diagnosis and repair.
If there are leaks on the valve, repeat steps 1-9. Make sure the valve is in the correct orientation and the clamps are snug and properly secured. If a problem still occurs, there may be a hose leak in need of diagnosis and repair.
crwdns2935221:0crwdne2935221:0
crwdns2935229:02crwdne2935229:0
crwdns2915084:0crwdne2915084:0

University of Memphis, Team 2-16, Willis Spring 2022 crwdns2935289:0University of Memphis, Team 2-16, Willis Spring 2022crwdne2935289:0
UM-WILLIS-S22S2G16
crwdns2934841:01crwdne2934841:0
crwdns2935303:01crwdne2935303:0