crwdns2915892:0crwdne2915892:0
The switch for the oven on this Philips Whirlpool stove from the 1990s is defective (worn out, loose connection).
It was difficult to figure out the function of the individual contacts, but once you know, replacing the switch is easy.
crwdns2942213:0crwdne2942213:0
-
-
Switch off the stove power breaker!
-
Only then: Pull out the stove and unscrew it.
-
-
-
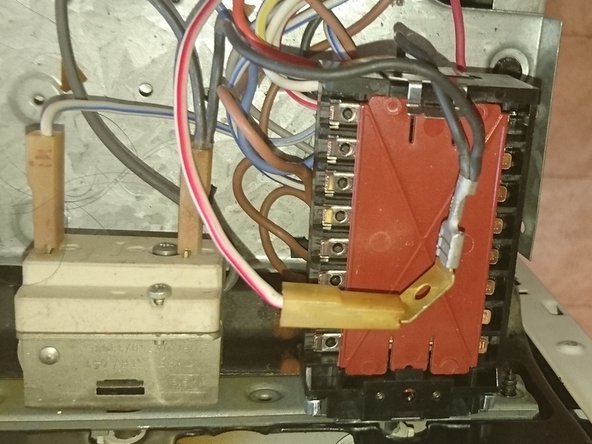
The oven switch (with 10 settings and 10 contacts) is defective, and the original replacement part after 30 years is no longer available.
-
-
-
-
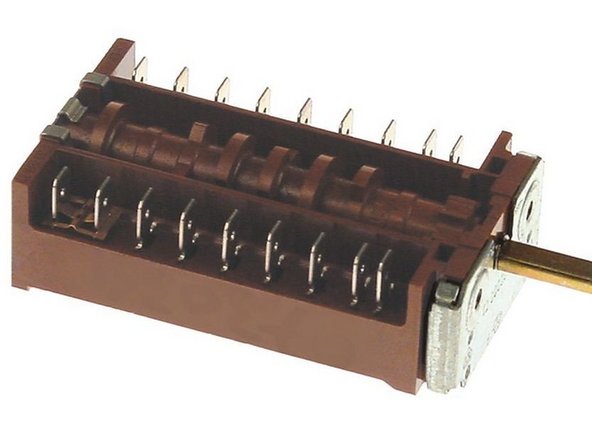
I found oven switches with 10 settings and 7 contacts online. They look completely different, but they do the same thing.
-
Good news: the two screws for attaching them fit, and the axle is the right length.
-
-
-
I measured the new and old switch and came up with the following assignment:
-
Switch Input:
-
1, 2, 3, 4, 5, 6 = brown = mains phase
-
7 = blue = mains neutral
-
Switch Output:
-
1 = brown = light || 2 = gray = motor || 3 = white = hot air
-
4 = red/white = top heat || 5 = yellow/white = bottom heat
-
6 = red = grill || 7 = blue/white = ‘return’
-
-
-
There is no separate output for the red temperature indicator light; this would require an 8-pin switch. However, it also works without this: simply connect the indicator light (brown) to 1 = light.
-
-
-
The second red/white (top heat ‘return’) is connected to black (thermostat).
-
Insulate with electrical tape!
-
Done! - For those who want to know exactly:
-
The original switch was able to switch the top heat and grill in series, i.e., it could establish a connection between red/white-2 and red.... No idea what that's good for.... The new replacement switch can't do that.... But no problem, it works this way too....
-


Follow the steps in reverse order to reassemble your device.
crwdns2934873:0crwdne2934873:0
100%

crwdns2934883:0oldturkey03crwdne2934883:0 crwdns2934875:0crwdne2934875:0
crwdns2934877:0crwdne2934877:0 ›
