Hey all, I’ve been having this issue on-and-off for the last year or so (owned them since 2017), and massaging the band/cable worked as a stop-gap measure until recently. They had a good run, so I thought I’d cut them open and share my findings for future tinkerers.
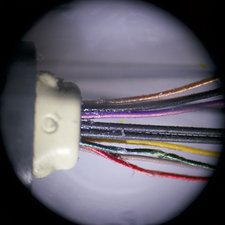
After cutting away the silicone sheathing, the band consists 2 black spring wires, 2 braided nylon threads, and 8 wires divided into 2 groups of 4. From bottom to top, in standby state (I couldn’t get it to turn on), these are:
- Red, 0.5V
- Yellow, 0V
- Grey, 0V
- Green, 0.5V
- Black, 0V (GND)
- Purple, 3.3V standby, 5V when charging (VCC)
- Copper (right speaker GND)
- Copper w/ red stripes (right speaker signal)
Speculating that connecting one of wires 1 or 4 to wires 2 or 3 might approximate a button press, I found neither worked to turn it on, even though it is charged (and still capable of charging). Thinking about it further, the button-side needs to be able to signal at least 5 states (LED off/red/white, button off/on), so any reductive shorting of these 4 wires wouldn’t suffice – the state must be conveyed digitally
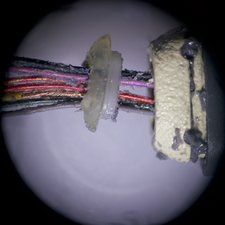
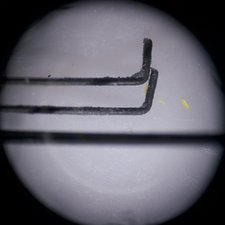
The band’s termination in each housing is recessed and hidden by a white plastic cap. Apple uses a silicone adhesive that 1) is messy and annoying and 2) erodes the wires’ insulation, so I found breaks in the insulation along the entire length of the band. The nylon threads are poorly-adhered by this adhesive and pull out very easily from their housing. The spring wire is also poorly-held by the adhesive, and functionally attaches to the housing via 90º hooks on their ends (the hooks of the spring wires are oriented parallel to one-another); pivot one by 45º in the flat plane of the housing (try one direction, then the other), before pulling straight out. I tried illuminating through the opening this left to see where the signal wires are soldered to the boards, but too much adhesive in the way
crwdns2934105:0crwdne2934105:0
crwdns2934113:0crwdne2934113:0
crwdns2915270:0crwdne2915270:0
crwdns2889612:0crwdne2889612:0
4